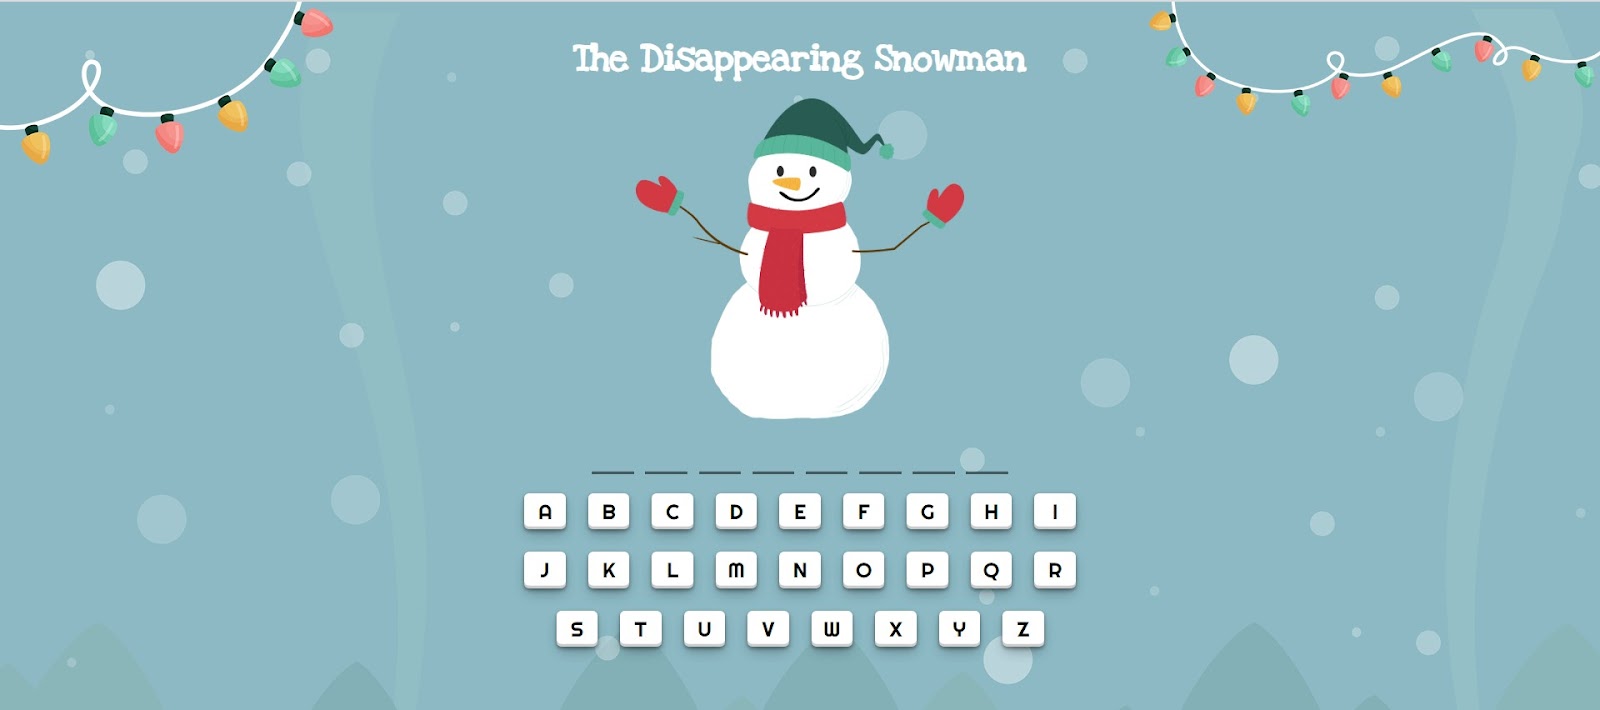
Guess the right word before your snowman melts!
We’ve created this tutorial just in time for the holidays. Code a fun word game that you can share with family and friends.
This Christmas-themed guessing game uses simple JavaScript code to power the game functions. Try coding this game following the tutorial and then customize it to make it your own.
Complete this JavaScript tutorial to make your own Disappearing Snowman Game.
Play the completed Disappearing Snowman Game.
Recommended: JavaScript for Kids
What you need:
1. Text editor
We’ll be using the CodeWizardsHQ editor to write and run our JavaScript code.
You can also use an online text editor like replit that allows you to author and run JavaScript programs in a web browser. Make sure you have all of the project base files in order for your program to work correctly.
2. Base Files
Download the base files and open the app.js file. This folder contains all the images and files you will need to complete your game.
- The HTML file holds the page title, emojis, and Player/Computer choice text.
- The CSS file adds some styling to our page and helps lay out the HTML elements.
- The
error-handler.jsfile will display a big red error box on the page if you make an error while typing out your JavaScript code. - The
app.js fileis where we’ll write our application code.
If you’re a CodeWizardsHQ student, download the x_hour_of_code_2022 project for the completed code. The starter files are in the javascript-projects/disappearing-snowman/starter-files directory.
Note: The index.html file (which executes the JavaScript) expects the filename app.js so you must use the same file name if you’re using your own text editor! You’ll edit the app.js file but you’ll always run the index.html file.
This tutorial is for beginner JavaScript programmers ages 8+. It assumes you understand basic HTML/CSS and JavaScript. Let’s get started!
Step 1: Fade keyboard keys on click
When someone uses our app, they’ll try to guess the hidden word one letter at a time by clicking the keyboard on the page with their mouse. In this step, we’ll fade out each letter they click and ensure that no more logic runs on a faded-out letter.
- In the
styles.cssfile there’s a CSS class to make a keyboard key look faded out calledselected. We’ll attach this class to whatever keyboard key the user clicks using JavaScript. You don’t have to type anything in the CSS file, this is just provided as a reference so you know why attaching this class to an HTML element makes it look faded out.
/* Added by JavaScript */

.hidden {
    display: none;
}

.selected {
    opacity: 0.3;
}
Navigate back to your app.js file to add the selected class to any key the user clicks.
- First, create a variable called
keyboardContainer - Use the
document.querySelector()function to reference the element with the ID ofkeyboard-containerand store it in thekeyboardContainervariable - Then, we need to run code whenever an element in the
keyboardContaineris clicked. We can use theaddEventListener()function to ensure a function calledhandleKeyboardClick()(which we’ll define in just a minute) will run whenever a user clicks inside thekeyboardContainer. Theclickevent is triggered by clicking your mouse anywhere inside thekeyboardContainerHTML element.
var words = ["APPLE", "PANCAKES", "COMPUTER", "PARIS", "MICROPHONE", "PASTRY"];
var randomWord = getRandomWord(words);

var keyboardContainer = document.querySelector("#keyboard-container");
keyboardContainer.addEventListener("click", handleKeyboardClick);- Create the function
handleKeyboardClick()and define a single parameter calledeventthat will be passed to this function whenever thekeyboardContaineris clicked. - Whenever our
keyboardContaineris clicked, we’ll run thehandleKeyboardClick()function.
keyboardContainer.addEventListener("click", handleKeyboardClick);

generateHiddenWord(randomWord);

function handleKeyboardClick(event) {

}- Create a variable called
clickedElement. We can get information about the element that was clicked by using thetargetproperty. We’ll store the element that was clicked in the variable. - Anytime a user clicks inside the
keyboardContainerelement our click event listener will fire. But, we only want to continue if they click on a letter. Check if theclickedElementdoes not (!) contain theletterclass or if (||) contains theselectedclass (which we’ll add next). If either of those conditions is true, we’ll use thereturnkeyword to immediately exit the function. - Finally, we’ll add the
selectedclass to ourclickedElementto ensure the CSS styles are applied to make it fade out a bit.
function handleKeyboardClick(event) {

    var clickedElement = event.target;

    if (!clickedElement.classList.contains("letter") || clickedElement.classList.contains("selected")) return;

    clickedElement.classList.add("selected");

}Step 1 Output:

Step 2: Check for a match when clicking a keyboard key
In this step, we’ll check to see if the keyboard key a user clicks matches any of the letters in the hidden word. If so, we’ll show all of the matching letters in the hidden word.
- First, let’s define a function called
checkForMatch(). This function will take theclickedLetteras a parameter and will check to see if it matches any of the hidden letters. - Create a variable called
hiddenLetterElementswhere we’ll store references to the hidden letters. We’ll need to know all of the hidden letters on the page in order to compare them with theclickedLetterparameter. To get them, usedocument.querySelectorAll()and select all elements with the classhidden. ThequerySelectorAll()method returns an array-like object that represents any HTML elements with the selector passed into the parentheses.
generateHiddenWord(randomWord);

function checkForMatch(clickedLetter) {
  var hiddenLetterElements = document.querySelectorAll(".hidden");
}

function handleKeyboardClick(event) {
  ...
}- Once we have all of the
hiddenLetterElements, we can use afor...ofloop to loop through the hidden letters one at a time. We’ll compare them with theclickedLetterthat was passed in as a parameter to the function. - In the
for...ofloop, create a variable calledhiddenLetterand get thetextContentof thehiddenLetterElement. - Then, use a conditional statement to compare the
hiddenLetterwith our clickedLetter parameter and see if they are the same. The===operator ensures that both items it compares are equal. - The last thing we need to do in our
checkForMatch()function is to remove thehiddenclass from anyhiddenLetterElementwhose letter matches theclickedLetter. Theremove()method of theclassListobject allows us to remove a class from an HTML element.
function checkForMatch(clickedLetter) {
    var hiddenLetterElements = document.querySelectorAll(".hidden");

    for (var hiddenLetterElement of hiddenLetterElements) {
        var hiddenLetter = hiddenLetterElement.textContent;
        if (hiddenLetter === clickedLetter) {
            hiddenLetterElement.classList.remove("hidden");
        }
    }
}- Finally, back in our
handleKeyboardClick()function, create aclickedLettervariable to store thetextContentof theclickedElement. - Then we’ll pass this variable to our new
checkForMatch()function. This ensures that whenever a user clicks a keyboard letter,handleKeyboardClick()will check for a match with that letter and all of the hidden letters. - Run your program and try clicking a few of the keyboard letters. You should see the ones that match the hidden letters show up on the page!
function handleKeyboardClick(event) {
    var clickedElement = event.target;

    if (!clickedElement.classList.contains("letter") || clickedElement.classList.contains("selected")) return;

    clickedElement.classList.add("selected");

    var clickedLetter = clickedElement.textContent;
    checkForMatch(clickedLetter);

}
Step 2 Output:
Step 3: Remove a snowman part when there’s no match for a clicked keyboard key
Now that we can tell if a user found a match or not, we need to remove a snowman part whenever there isn’t a match. This makes it seem like the snowman is melting if you guess a letter incorrectly!
- Our snowman is made up of a few parts that are distinguished by CSS classes. The main parts have the classes hat, face, scarf, hands, body-top, body-middle, and body-bottom. You can see these parts if you view the HTML in
index.html.
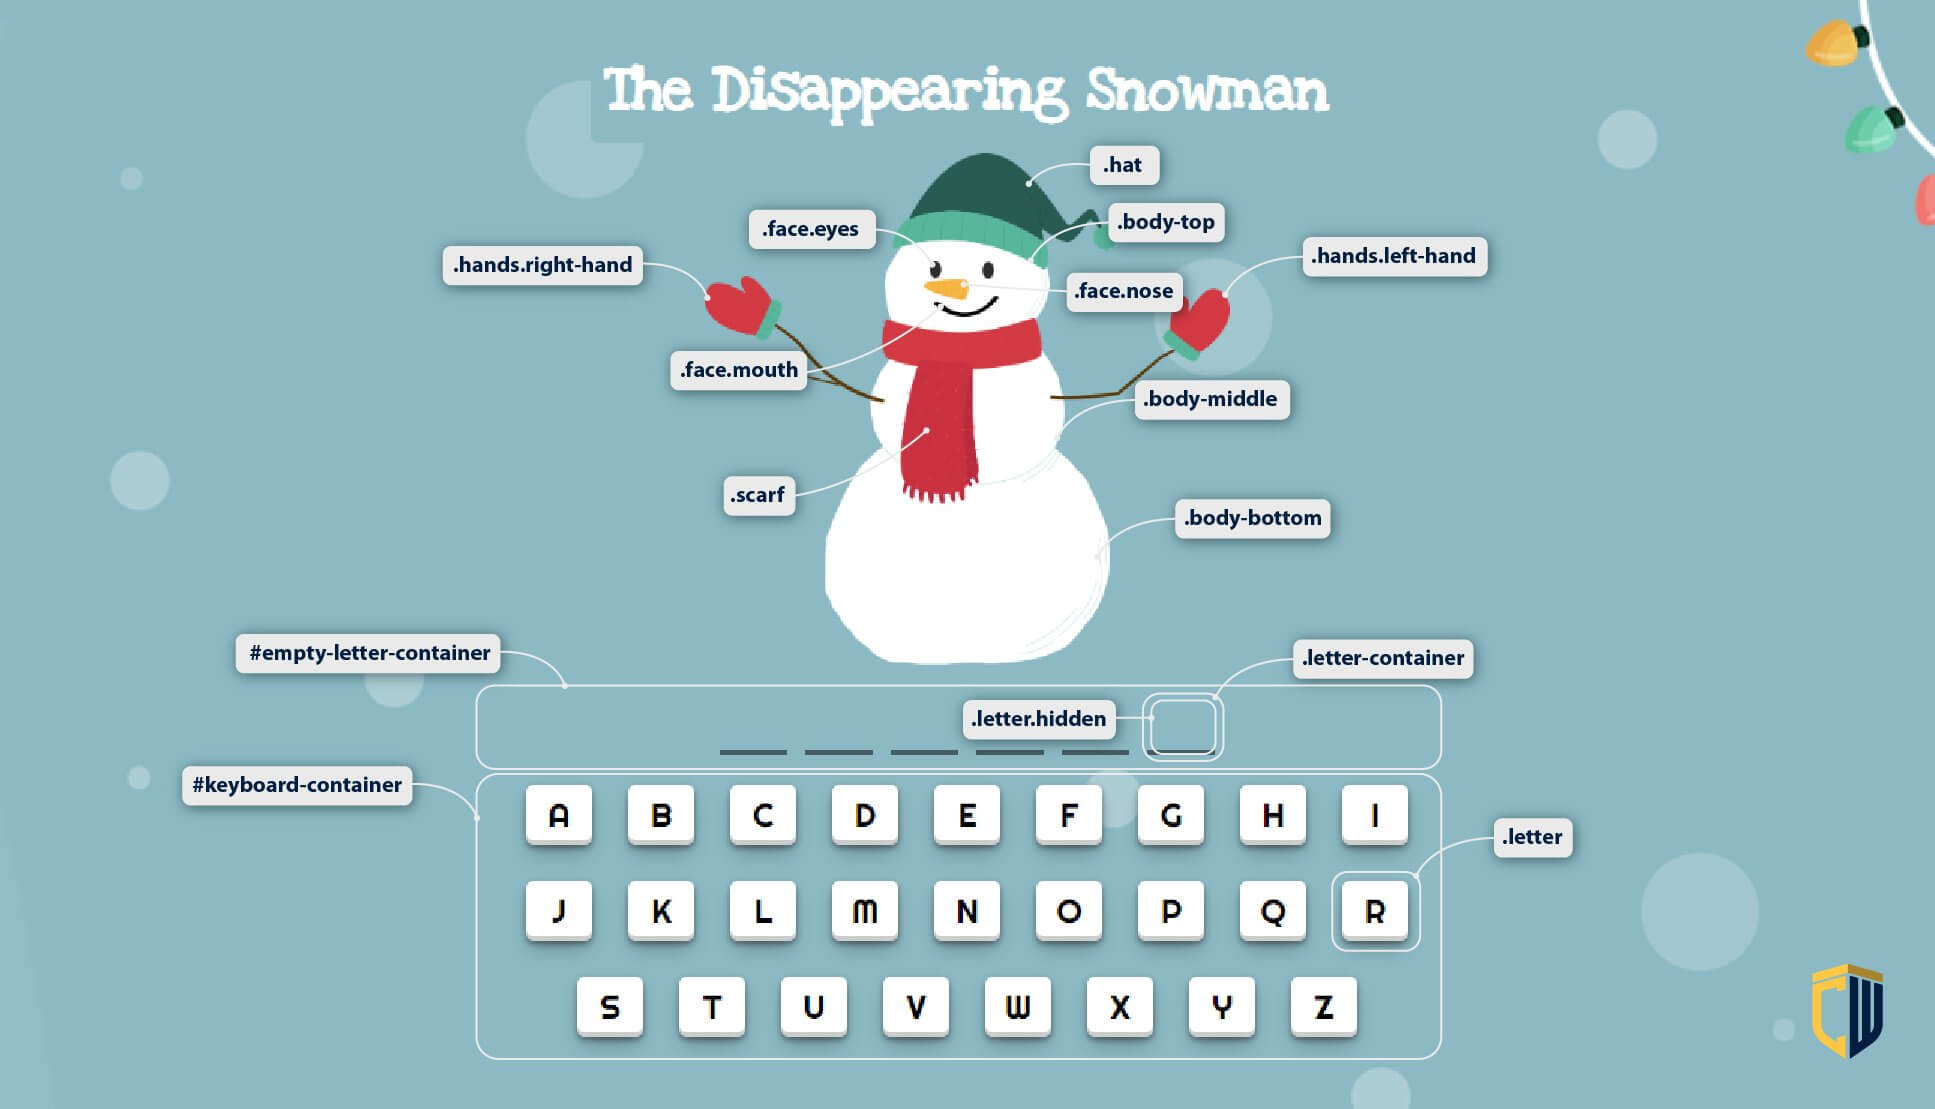
index.html (no changes here, just shown for context)
<section id="snowman-container">
    <img class="hat" src="images/hat.png" />
    <img class="face nose" src="images/nose.png" />
    <img class="face eyes" src="images/eyes.png" />
    <img class="face mouth" src="images/mouth.png" />
    <img class="scarf" src="images/scarf.png" />
    <img class="hands left-hand" src="images/left-hand.png" />
    <img class="hands right-hand" src="images/right-hand.png" />
    <img class="body-top" src="images/body-top.png" />
    <img class="body-middle" src="images/body-middle.png" />
    <img class="body-bottom" src="images/body-bottom.png" />
</section>- In app.js, create an array called
snowmanPartsand store each of the classnames. Order them from top (hat) to bottom (body-bottom). Note that each snowman part starts with a dot (.). This is a CSS notation that indicates each string represents a CSS class, and we’ll use the strings in thesnowmanPartsarray to query the correct HTML element by its class name.
app.js
var words = ["APPLE", "PANCAKES", "COMPUTER", "PARIS", "MICROPHONE", "PASTRY"];
var randomWord = getRandomWord(words);
var keyboardContainer = document.querySelector("#keyboard-container");
var snowmanParts = [".hat", ".face", ".scarf", ".hands", ".body-top", ".body-middle", ".body-bottom"];

keyboardContainer.addEventListener("click", handleKeyboardClick);- Create a function called
removeSnowmanPart(). This function will remove a single snowman part associated with those main classes each time the user guesses a letter that isn’t one of the hidden letters. - To remove the snowman parts from top-to-bottom, we need to remove the first item from the array each time
removeSnowmanPart()is called. To remove the first item from an array, you use theArray.shift()method. We’ll store the removed item (which represents a CSS class) in a variable calledsnowmanPart. - Next, create a variable called
partsToRemoveto store these parts. Get the HTML element that represents thesnowmanPartusingdocument.querySelectorAll(). Remember,snowmanPartis a CSS selector (it starts with a dot) andquerySelectorAll()will give us an array-like object of all HTML elements matching the selector we give it.
function removeSnowmanPart() {
    var snowmanPart = snowmanParts.shift();
    var partsToRemove = document.querySelectorAll(snowmanPart);
}- The final step of our function definition will be to loop through all of the
partsToRemoveand remove each part from the HTML document. To do this, we can create afor...ofloop and then call theelement.remove()function on eachpartToRemove. Theelement.remove()function removes an HTML element from the page.
function removeSnowmanPart() {
    var snowmanPart = snowmanParts.shift();
    var partsToRemove = document.querySelectorAll(snowmanPart);

    for (var partToRemove of partsToRemove) {
        partToRemove.remove();
    }
}- Before we can determine if the user guessed incorrectly, we’ll need to edit the
checkForMatch()function to return a boolean value:trueorfalse. We starthasMatchasfalse, and only change it totrueif there is a match when we are comparing theclickedLetterto thehiddenLetterin thefor...ofloop. - The
removeSnowmanPart()function should be called only when the user doesn’t guess the correct hidden letter in ourhandleKeyboardClick()function. ThecheckForMatch()function will returntrueif we found a match, andfalseotherwise.
function checkForMatch(clickedLetter) {
    var hiddenLetterElements = document.querySelectorAll(".hidden");
    var hasMatch = false;
    for (var hiddenLetterElement of hiddenLetterElements) {
        var hiddenLetter = hiddenLetterElement.textContent;
        if (hiddenLetter === clickedLetter) {
            hiddenLetterElement.classList.remove("hidden");
            hasMatch = true;
        }
    }

    return hasMatch;
}- Finally, in our
handleKeyboardClick()function, we can create a variable calledhasMatchand store the returned value from thecheckForMatch()function. Remember, this variable is either the boolean valuetrueorfalse. - We can then use that value in a conditional statement and call the
removeSnowmanPart()function if there was no match. The ! operator means “not”, so we’re saying “If there’s no match, remove a snowman part” in this code sample.
function handleKeyboardClick(event) {
    var clickedElement = event.target;

    if (!clickedElement.classList.contains("letter") || clickedElement.classList.contains("selected")) return;

    clickedElement.classList.add("selected");

    var clickedLetter = clickedElement.textContent;
    var hasMatch = checkForMatch(clickedLetter);

    if (!hasMatch) {
        removeSnowmanPart();
    }
}
Step 3 Output
Recommended: JavaScript Classes for Kids
Step 4: Check if the player loses
A game is no fun without winners and losers! In this step, we’ll show a message if the user guesses incorrectly too many times and the snowman melts before they guess the hidden word.
- We’ll create a function called
checkForLoser()to check if the snowman has melted and the user loses. You lose when the snowman has melted, and in our program we’re removing a part from thesnowmanPartsarray every time a user guesses a letter that isn’t in the hidden word. The snowman will be “melted” when there are no parts left in thesnowmanPartsarray. We can check if there are no parts left in thesnowmanPartsarray using a conditional statement and by comparing the length property of thesnowmanPartsarray to 0.
function checkForLoser() {
    if (snowmanParts.length === 0) {

    }
}- In our conditional statement, we’ll add two messages to the page. The first will replace all the HTML in the
snowman-containerelement with the text “You lost, game over!”. The second will replace all of the HTML in thekeyboardContainerwith the text “The word was: [RANDOM WORD]”. The RANDOM WORD will be whatever value is stored in therandomWordvariable. Note that we can query and adjust thesnowman-containeron a single line since we don’t already have a reference to that HTML element stored in a variable.
function checkForLoser() {
    if (snowmanParts.length === 0) {
        document.querySelector("#snowman-container").innerHTML = "<h2>You lost, game over!</h2>";
        keyboardContainer.innerHTML = `<h2>The word was: ${randomWord}</h2>`;

    }
}- Now that our
checkForLoser()function is working, we need to call it whenever the user clicks a key on the keyboard and the letter doesn’t match a letter in the hidden word. We’ve already got a conditional statement in thehandleKeyboardClick()function to check if the user didn’t guess a matching letter, so we can call ourcheckForLoser()function after theremoveSnowmanPart()function. This will ensure that we only check if the snowman is melted after removing a snowman part.
function handleKeyboardClick(event) {
    var clickedElement = event.target;

    if (!clickedElement.classList.contains("letter") || clickedElement.classList.contains("selected")) return;

    clickedElement.classList.add("selected");

    var clickedLetter = clickedElement.textContent;
    var hasMatch = checkForMatch(clickedLetter);

    if (!hasMatch) {
        removeSnowmanPart();
        checkForLoser();
    }
}
Step 4 Output

Step 5: Check if the player wins
For our final step, we’ll show a message if the player guesses the hidden word without melting the snowman!
- First, we’ll create a function called
checkForWinner(). A user wins when there are no more hidden letters, so this function’s job will be to show a winning message when there are no more hidden letters on the page. - Create a variable called
hiddenLetterElements. To check for hidden letters, we first need a reference to all of the elements on the page with the classhidden. We can usedocument.querySelectorAll()to get an array of all the HTML elements with the classhiddenand store them inhiddenLetterElements.
function checkForWinner() {
    var hiddenLetterElements = document.querySelectorAll(".hidden");
}- We can check the
lengthproperty of thehiddenLetterElementsarray to see if there are any more HTML elements with thehiddenclass on the page. If thelengthproperty is 0, there are no more hidden letters on the page. - When there are no more hidden elements, the user wins! We can use the
innerHTMLproperty of thekeyboardContainerto put a winning message on the page in place of the keyboard.
function checkForWinner() {
    var hiddenLetterElements = document.querySelectorAll(".hidden");
    if (hiddenLetterElements.length === 0) {
        keyboardContainer.innerHTML = "<h2>You win!</h2>";
    }
}- Finally, we need to call our
checkForWinner()function every time the user guesses a letter correctly. We’re checking if the user guessed correctly inhandleKeyboardClick(). We can add anelseclause to our conditional statement at the end of that function and call ourcheckForWinner()function in the body of theelseclause. This guarantees that every time the user has a match, we check if they won.
function handleKeyboardClick(event) {
    var clickedElement = event.target;

    if (!clickedElement.classList.contains("letter") || clickedElement.classList.contains("selected")) return;

    clickedElement.classList.add("selected");

    var clickedLetter = clickedElement.textContent;
    var hasMatch = checkForMatch(clickedLetter);

    if (!hasMatch) {
        removeSnowmanPart();
        checkForLoser();
    } else {
        checkForWinner();
    }
}
Step 5 Output

Your program is complete!
Check out the finished Disappearing Snowman Game.

Download the project files and open app.js to view the completed project.
This is just an example of what you can build when you learn JavaScript. There are plenty of exciting projects you can try and continue to build your skills.
Download JavaScript Projects Source Code
If you want to get the code behind 7 different JavaScript projects, download the full source code for free. You can use this code as an example to add to or inspire new projects. Enter your email below:
If you want to code more websites and games in JavaScript, join CodeWizardsHQ’s live coding classes for kids. It’s the most fun and effective way for kids to learn JavaScript and other real-world languages..
Students in all of our core tracks study JavaScript because of its importance in web development and beyond. They work with a live, expert instructor who supports them every step of the way. Classes are engaging and you’ll build a portfolio of websites, games, and apps as you learn.
Have fun and happy holidays!