Minecraft is arguably the best-selling game of all time, depending on what kind of statistics you are looking at and who is doing the research. Regardless of its exact placement on the list, there is no doubt that it is one of the most popular games downloaded. There are a handful of reasons for this.
- Minecraft can be downloaded on nearly any gaming platform including, but not limited to, PC, Mac, Xbox, Playstation, Nintendo Switch, mobile, and tablet.
- Single-player gives you a perpetual amount of possibilities on how you can play Minecraft and alter your world. However, this alone isn’t enough reason for Minecraft nearing the top of the list. The real answer lies in its multiplayer capabilities.
- Minecraft provides you with the option of enjoying your gameplay experience with friends.
For most people, connecting with friends through multiplayer gameplay is the best way to play. What’s even better is that there are multiple options you can use to play Minecraft with friends including:
It’s highly recommended you understand the difference in each option and what they offer because choosing the best course of action can greatly enhance your gameplay and help you tailor your game to your needs. I’ll explain each below and give you a few pros and cons to help.
Split-Screen
Prior to internet gaming, split-screen was one of the most popular ways to play games with friends. Although most games nowadays do not offer split-screen capabilities, Minecraft has added that feature into every console edition.
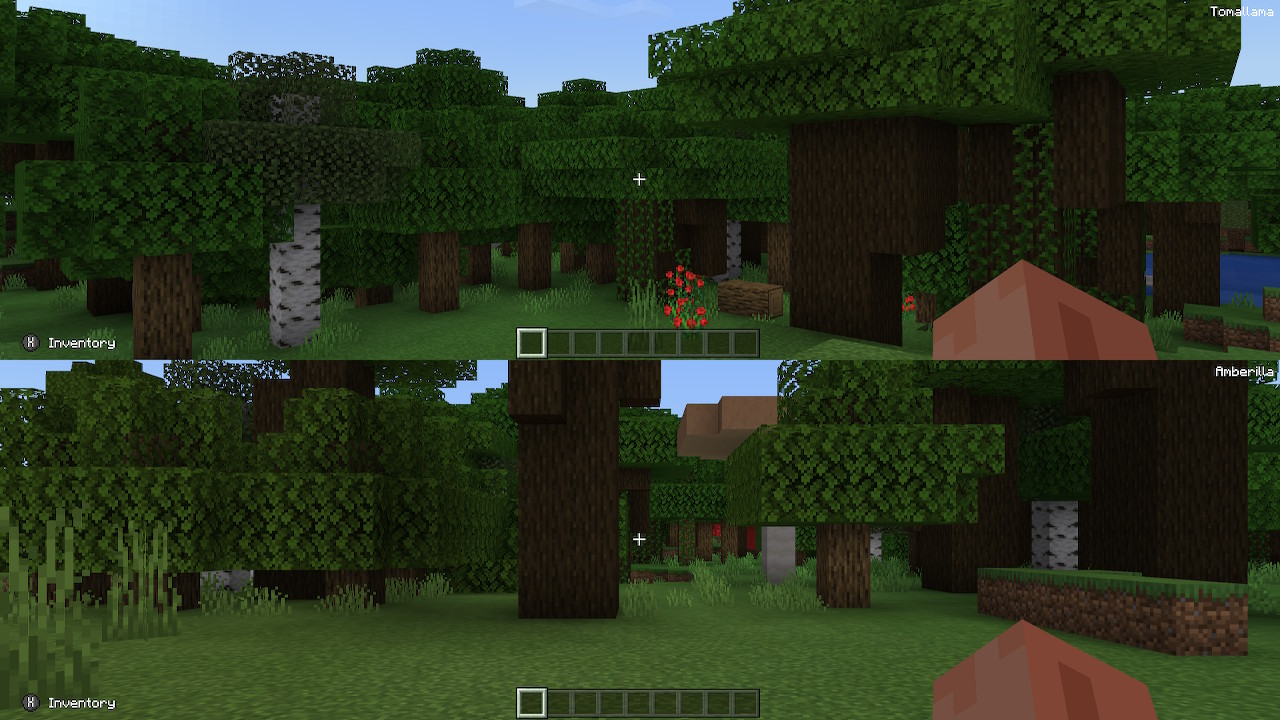
As the name implies, split-screen will split your screen into multiple smaller screens so each player has his or her own section to look at. Think Rocket League with two to four players. This means if you are playing with one friend, your TV will be separated into two separate images, but if you are playing with four players, then there will be four separate images.
How to Split Screens
- Log into Minecraft with your username and password
- Log into a single player world
- With your second remote press the Start button. You should see a new prompt on your game asking you to join as a second player.
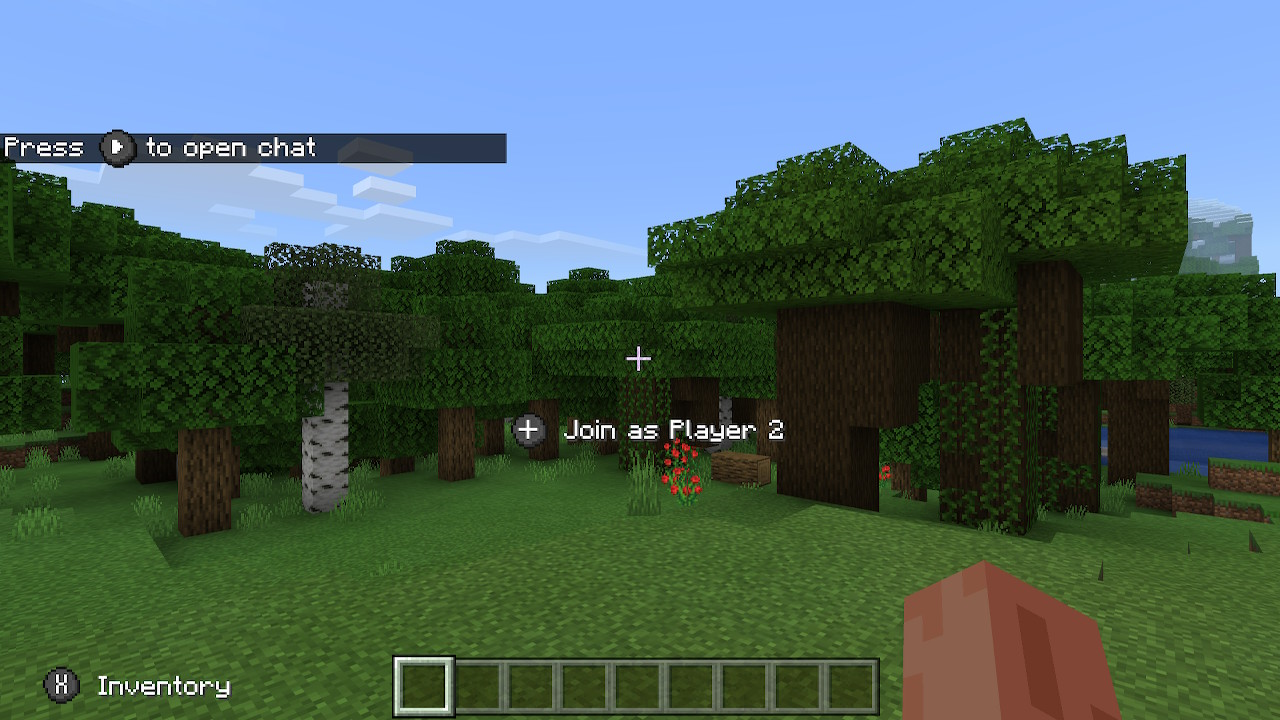
- Press Start one more time to see a new screen pop up with a list of player options to join as. You’re done! You and your friend can now both play on the same screen together!
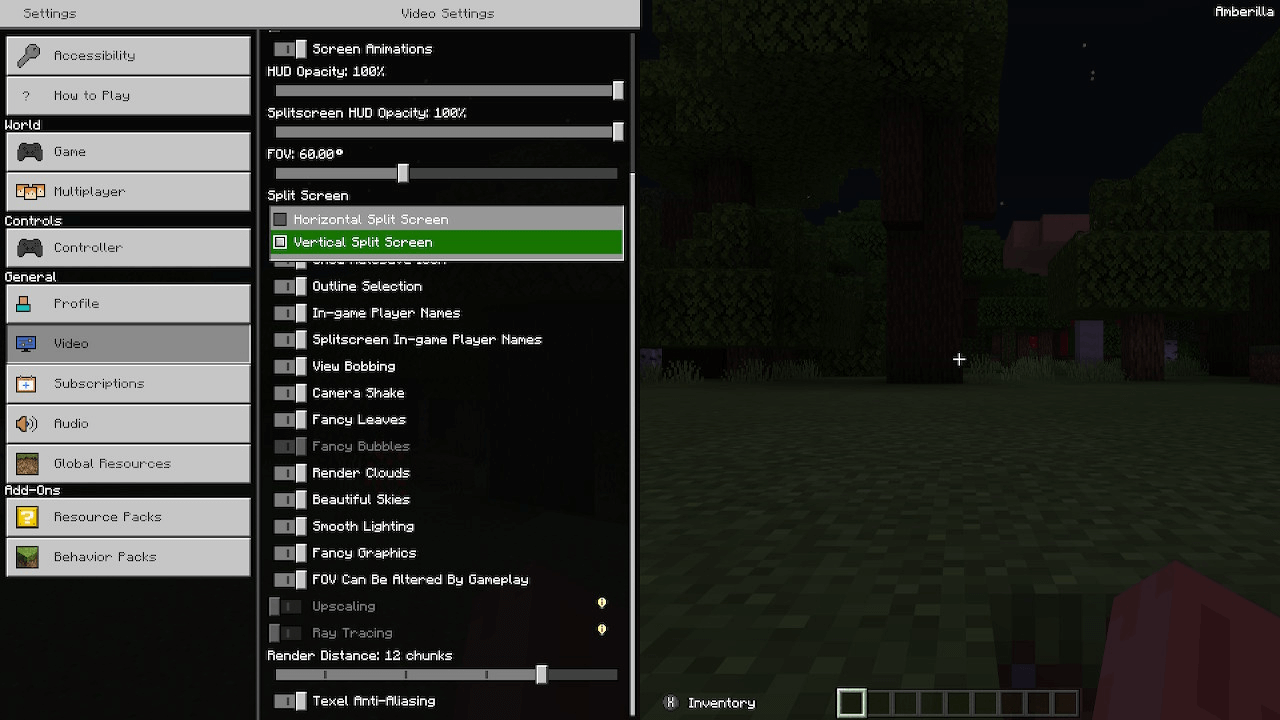
- Tip: If you do not like horizontal split-screen, you can adjust it to a vertical-split screen in the settings.
Pros/Cons of Split Screen
Split-screen is warranted for many reasons. It allows you to play with a friend without any internet connection, it offers highly cooperative gameplay by allowing you to know exactly where the other person is and what they are doing, and it provides a shared experience of playing in the same room as your friend. It’s also a nice way to get someone interested in playing if they don’t own a console or a copy of Minecraft.
However, like many things in life, split-screen has some drawbacks. Many people find sharing a screen with someone else a bad experience. If you are splitting your screen with one other person, the aspect ratio changes, while splitting with four people keeps the aspect ratio, but decreases the size of your view to a quarter of its normal size. Both options can be cumbersome and drop visual quality.
In addition, if you’re playing against each other you have no way to prevent the other person from looking at your screen unless you decide to hang a sheet in between both sides of the TV and trust me, we’ve done that and it’s not ideal. It’s also easy to get distracted, especially with audio. When you inevitably hear the creeper about to blow up is he near you or your friend?
| PROS | CONS |
|---|---|
| – No internet connection required – Less lag due to no internet connection – Only one console and copy of the game needed – Easier communication to increase cooperativity | – Players must be in the same room together while playing – Smaller screen and possible change of aspect ratio – Screen-cheating is difficult to prevent – Higher chance of distracted gameplay |
Recommended: Best Minecraft Texture Packs
LAN
There is another option you can use to play with friends in your home without sharing a screen. This is called using a LAN network.
LAN means Local Area Network, so in order for someone to connect to your game, they must be using the same internet network that you are using. This is as simple as making sure you are both either connected to the same wifi or directly connected to the same internet modem.
How to Set up LAN (Java Edition)
- Verify you have an active internet connection on the computer you are playing on
- Open Minecraft and log into your account
- Click the Single Player option
- Log into an existing world or create a new world
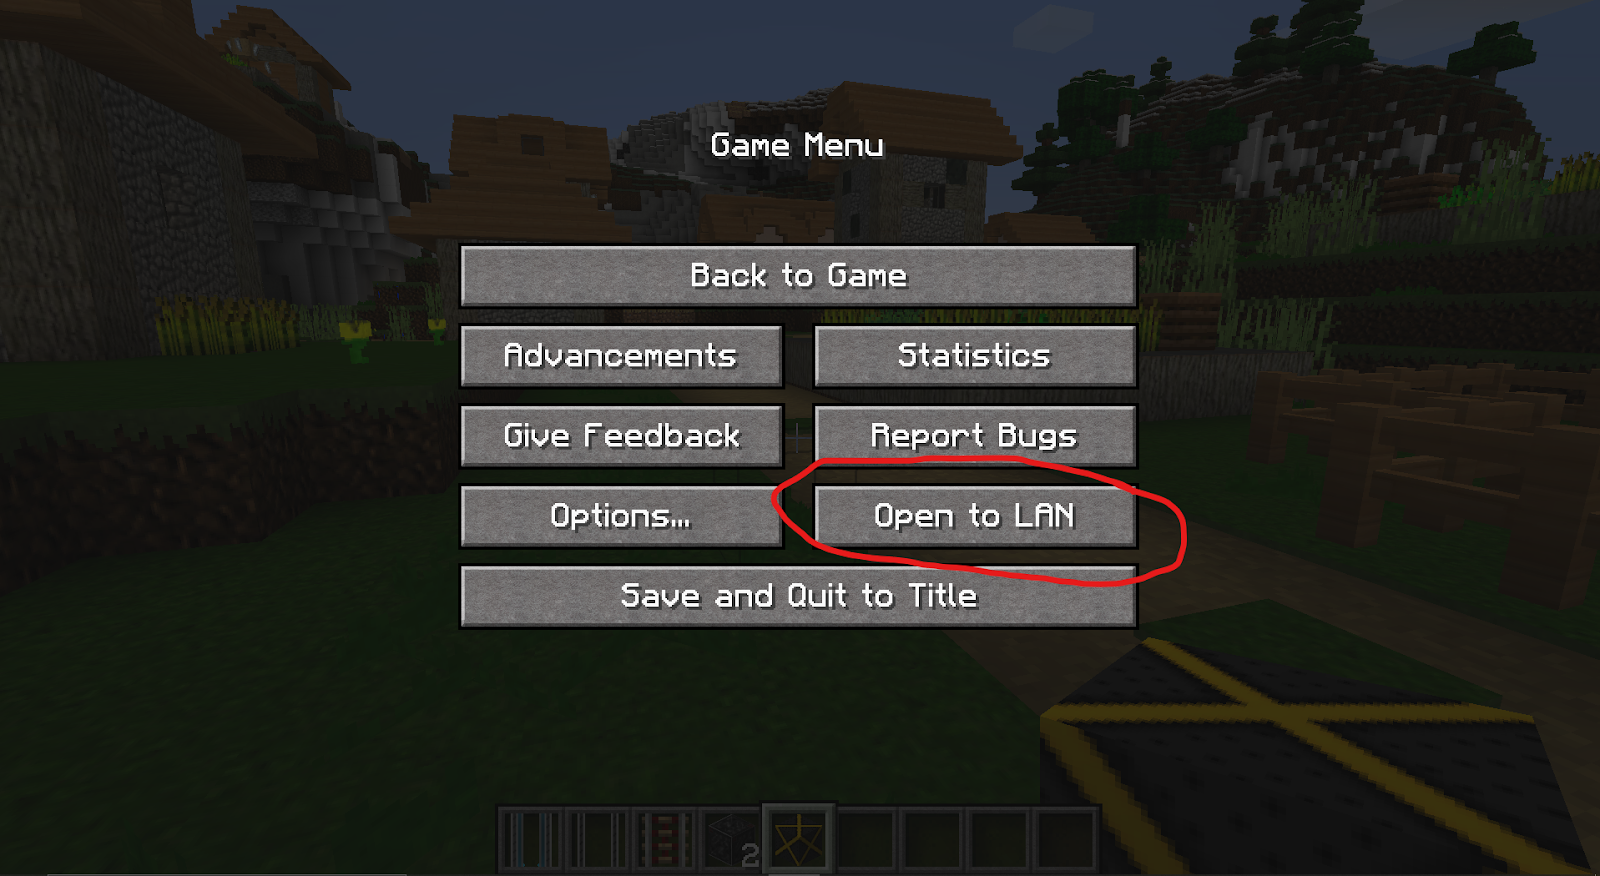
- Press esc to open the Game Menu
- Click Open to LAN
- Choose an option for Game Mode (Survival, Spectator, Creative, Adventure)
- Choose an option for Allow Cheats (On/Off)
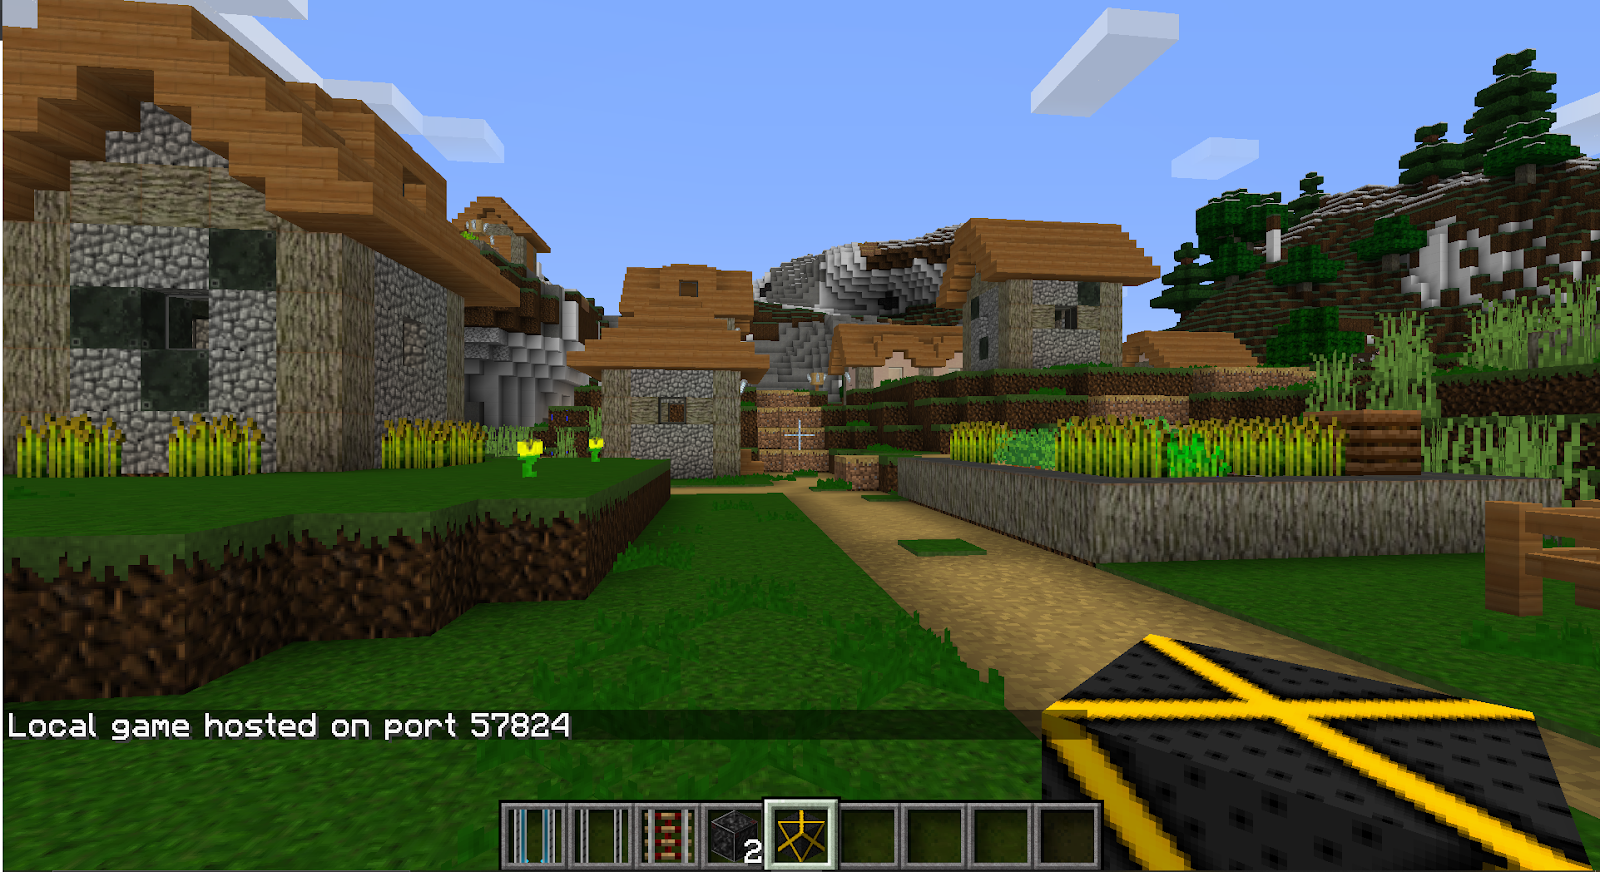
- Click Start LAN World. At this point, you should see a message on your screen that says “Local game hosted on port XXXXX” with a random number filled in. You can verify that your game is connected online now by pausing the game. If everything else pauses with you then something went wrong. However, if villagers and mobs still move even with your screen paused then you have successfully opened your game using local area network.
How to join a LAN Minecraft game (Java Edition)
- Verify you have an active internet connection on your machine
- Open Minecraft and log into your account
- Click the Multiplayer option
- Wait a few moments and you will see the LAN world show up
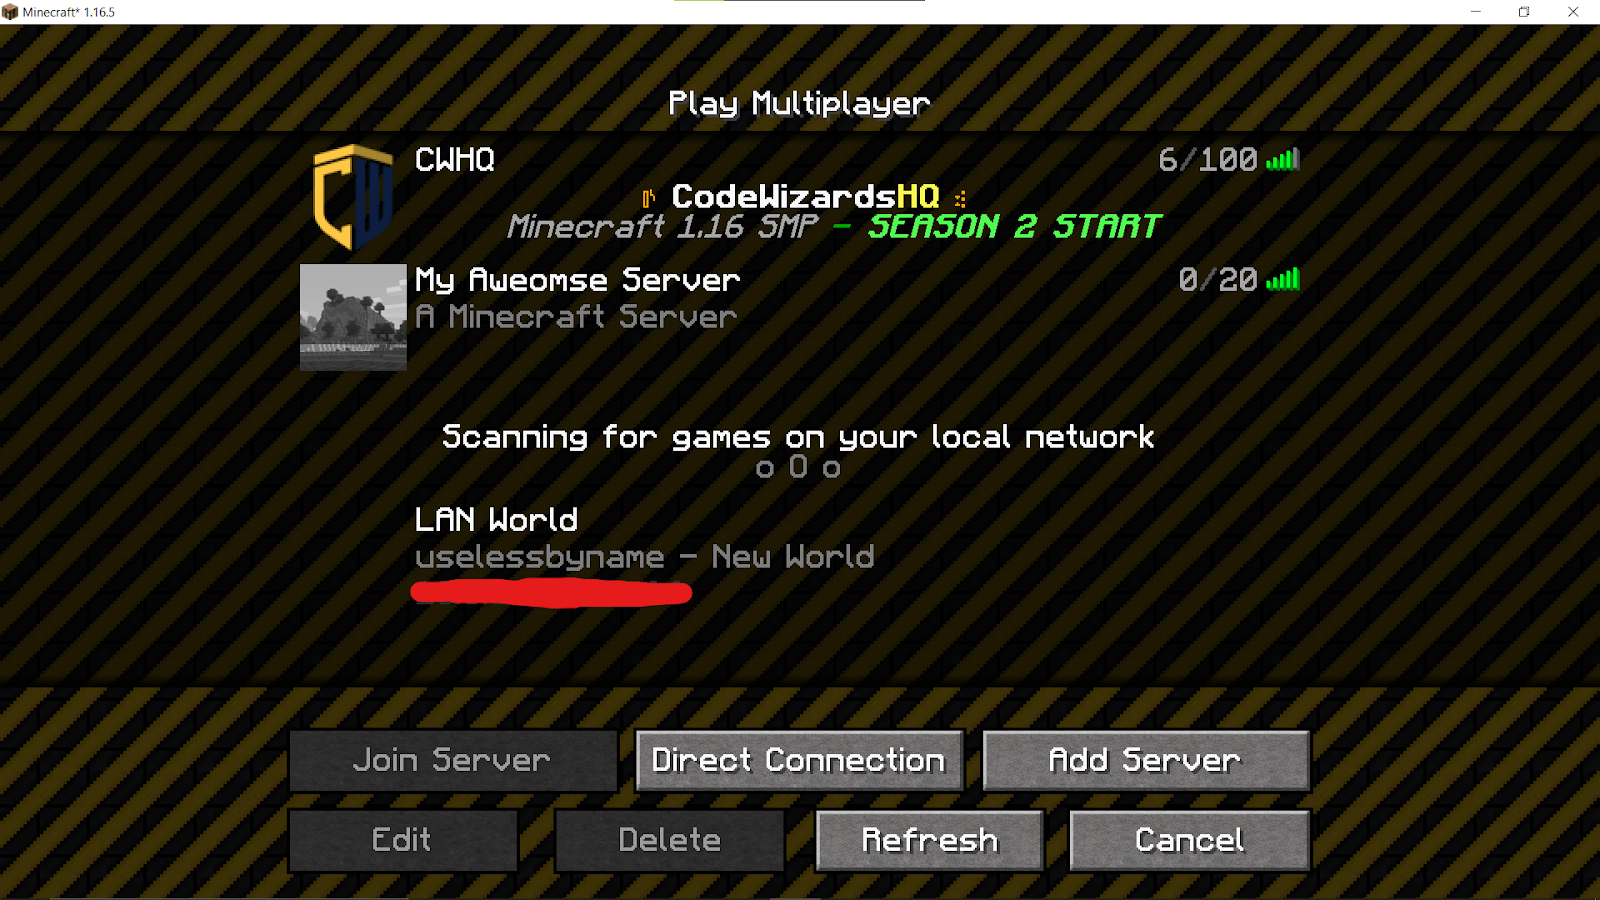
- Click Join Server and you’re good to go!
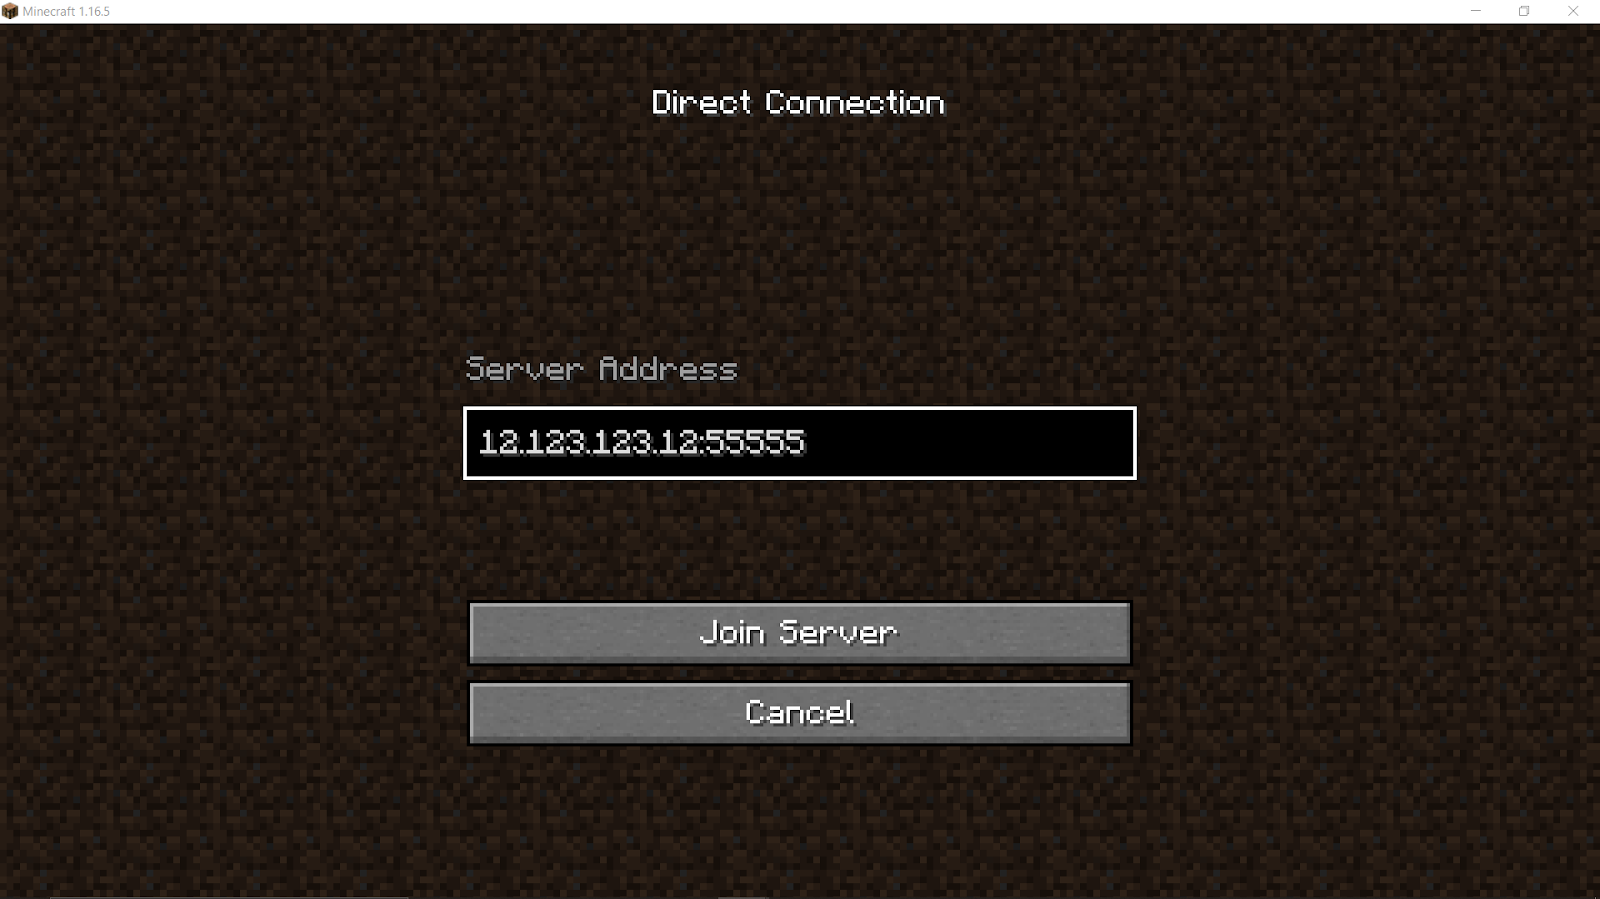
- Tip: You may not see your friends LAN World show up. If this happens, click Direct Connect and type in your friends’ IP address, followed by a colon, followed by the port number written in the chat when your friend created their LAN world. For example, if your friends’ IP address is 12.123.123.12 and their port number is 55555, you would type in 12.123.123.12:5555
Recommended: How to Install Minecraft Mods
How to Set up LAN (Bedrock Edition)
Step by step guide on how to get a LAN set up.
- Verify you have an active internet connection on your machine
- Open Minecraft and log into your account
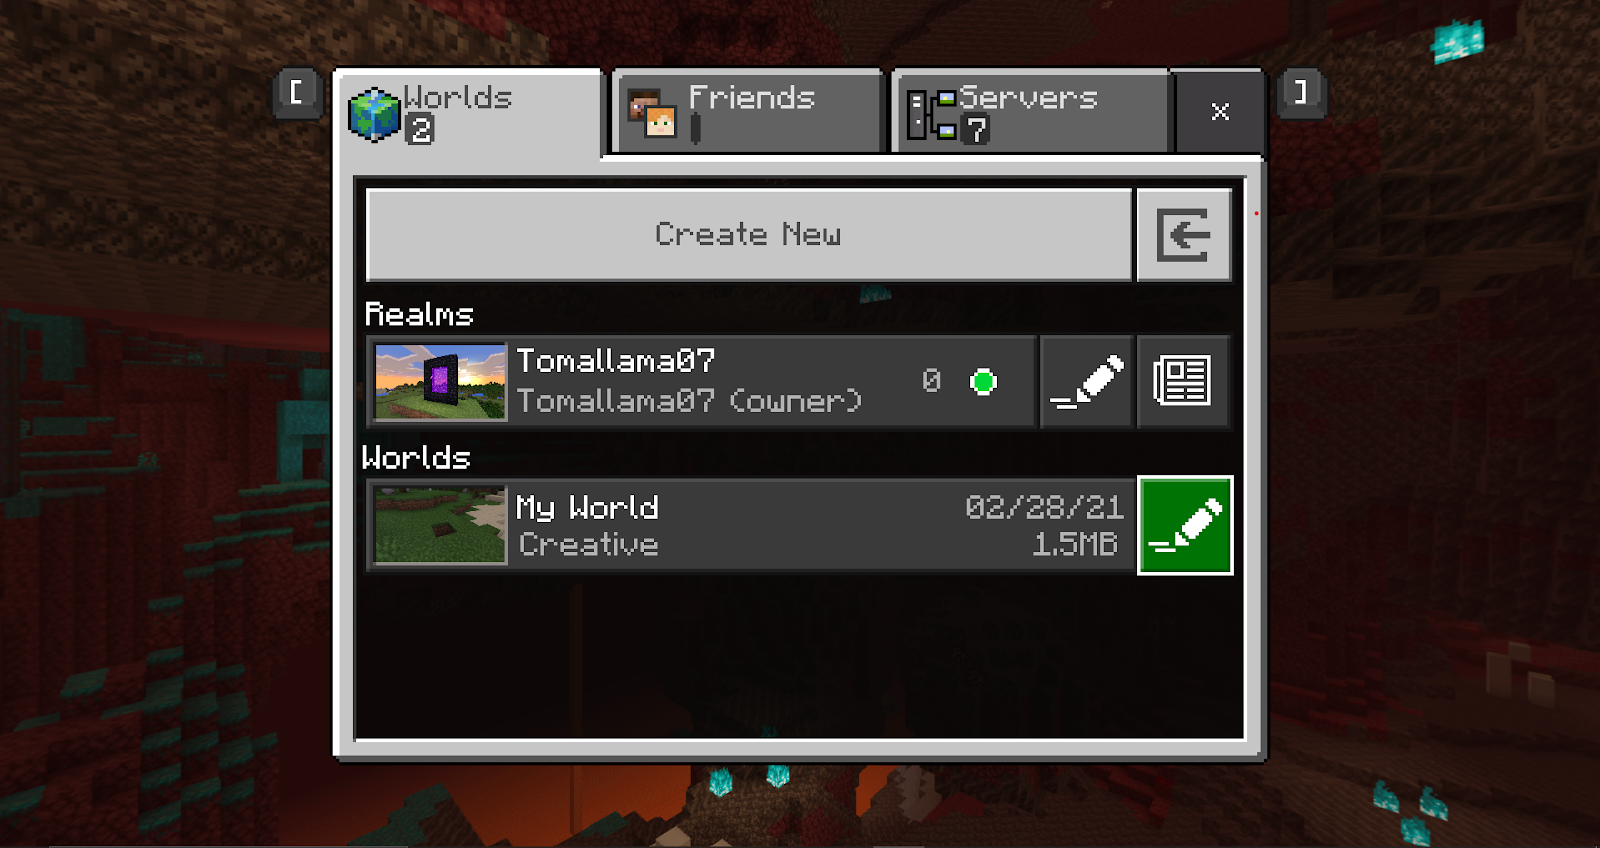
- Before logging into your world, click the pencil icon next to your world to go to Game Settings.
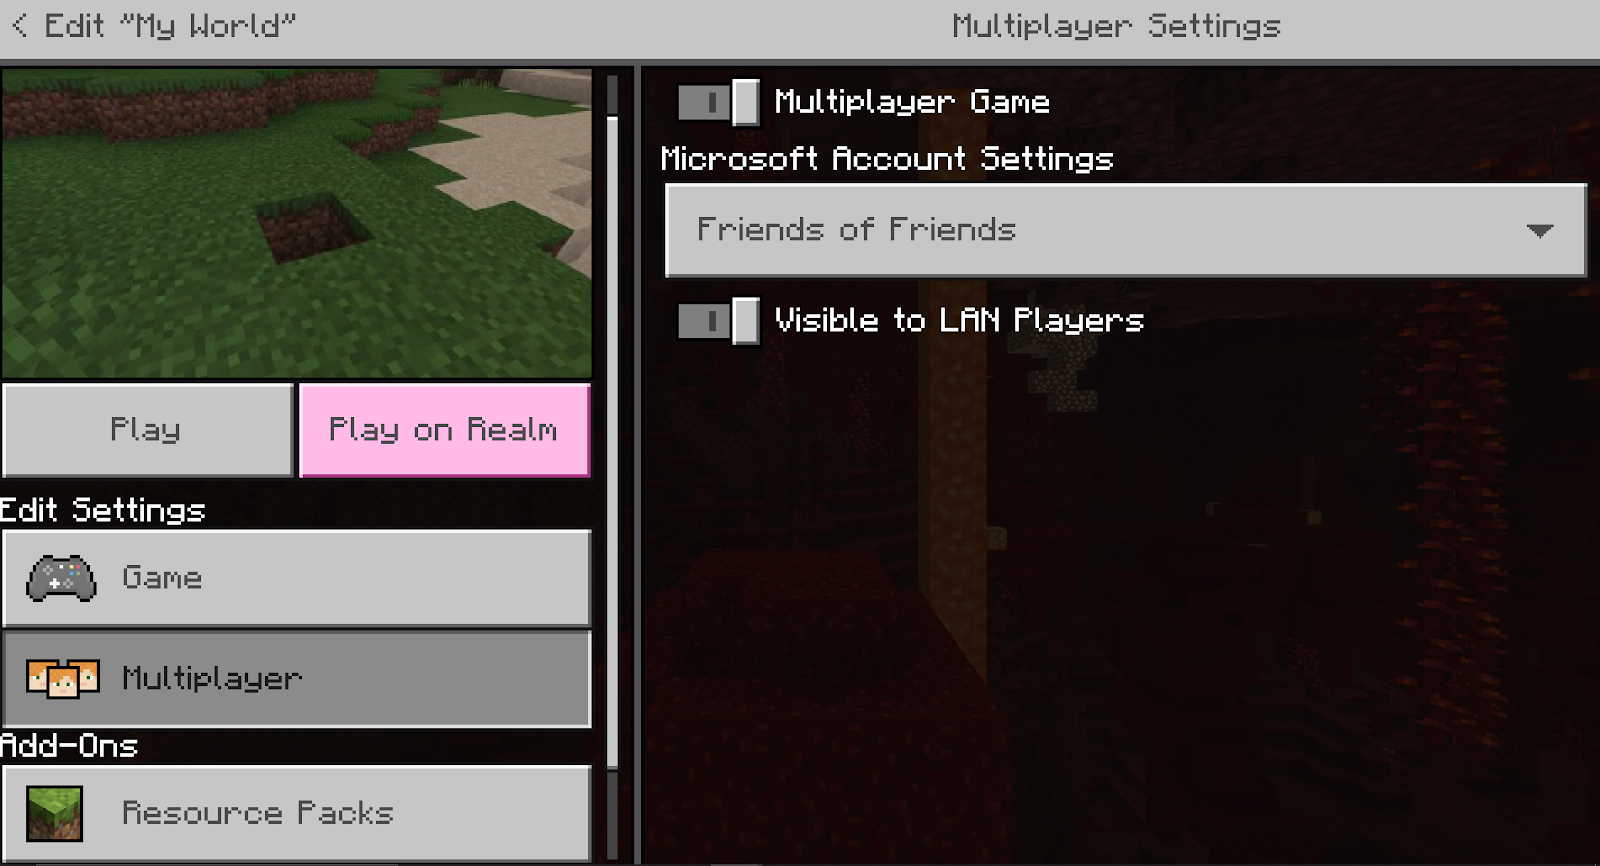
- Click the Multiplayer tab and verify both Multiplayer Game and Visible to LAN Players are checked.
- Log into your game. That’s it! Now other players can connect to your game as long as they are on the same network as you.
How to join a LAN Minecraft game (Bedrock Edition)
Step by step guide on how players can join a game together.
- Open Minecraft and log into your account
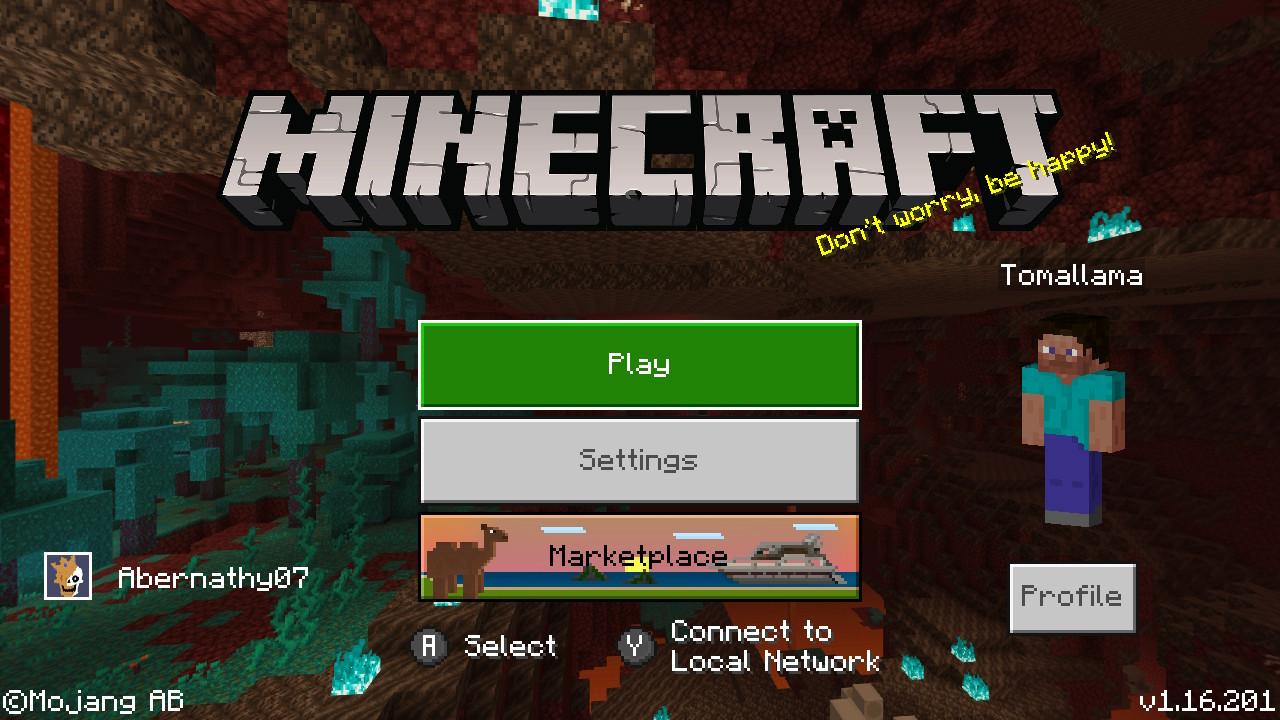
- Press Y to open LAN settings. Note that this button may be different depending on what platform you are using. You can verify by looking at the bottom of the home screen.
- You’ll see a new screen pop up asking if you’d like to join the online network or a local network. Remember, LAN stands for Local Area Network, so let’s select the Local Network option.

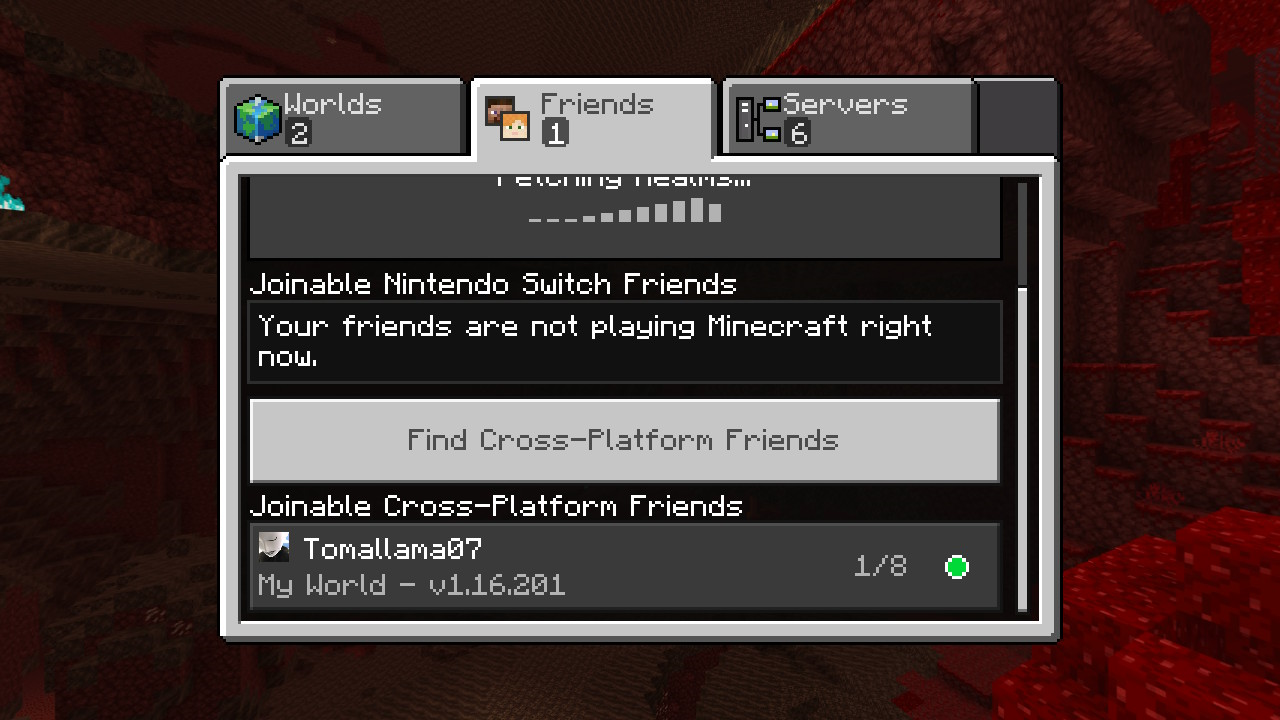
- Finally, go to the Friends tab and scroll down towards the bottom. You should see your friends’ world pop up. Your message may be a little different. I get a cross-platform message since I’m logging onto my Windows 10 hosted game from my Nintendo Switch.
Pros/Cons of LAN
There are many reasons you’d want to choose to play Minecraft using a LAN connection. The first and most obvious is it allows you to play with your friends. However, unlike split-screen, you each get your own monitor or TV to play on. This prevents skewing your aspect ratio and or decreasing the size of your view by over half. Contrary to using a server, a LAN network is much safer and easier to set up. You don’t need to provide your IP address or port-forward your router. You also don’t need to pay any fees for someone else to host your server.
The downside of using LAN is you will still need an active internet connection and your friend will need to be within range of accessing that internet connection through either Wifi or by direct connection. This also means that your game will run based on the speed and quality of your internet connection. Slow internet? Laggy game. Choppy internet? Be prepared to be disconnected periodically. Performance can also be affected because the host of the LAN game must use and play on the same computer from where they are hosting the game unless they have a second account which can put stress on their machine.
| PROS | CONS |
| – You can play with your friends without sharing a screen – Much easier to set up than running your own server – Higher network safety than accessing another networking or allowing someone else to access your network – Has no cost attached aside from your own internet connection | – Players must be on the same network which limits their range – Gameplay performance is determined by network quality of the host’s connection – Unable to host the game from a dedicated machine without owning another Minecraft account |
Recommended: How to Make a Minecraft Server
Minecraft Server
A Minecraft server is the most advanced option of multiplayer Minecraft. It has all of the same features as connecting with LAN with a few additions. First of all, it allows anyone to connect to your server regardless of where they are instead of limiting access to only those on your network. Second, it gives you the option of dedicating a machine to run the server while you can log on to your account from a separate machine to ease up on resources.
You can either make your own Minecraft server or you can have a third party host one for you, with each having its own benefits. If you’re interested in having someone else be in charge of your server check out our article on how to make a Minecraft server using hosting.
How to make a Minecraft server
Running a server yourself means you are in charge of everything such as downloading the resources you need, configuring how the server acts and behaves, and using your own hardware. If making and running a server yourself sounds interesting to you then it’s possible with just a short series of steps.
You will need to download the proper files then set up your server configurations. You will also need to set up port forwarding if you want people to access your server from outside your network (remember, this is something you cannot do on a LAN network!). After the networking portion is set up and you edit your server properties as you see fit, you can launch your game. Read our step by step instructions on how to setup your own Minecraft server.
How to join a Minecraft server
- Verify the server is set up and running. Verification for this can be achieved by having the server host look at their server.jar file after it’s opened. It should show something like this:

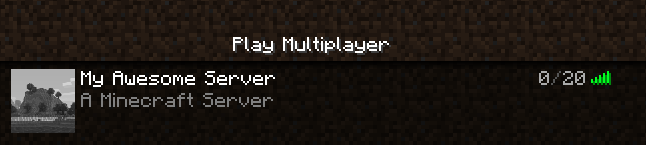
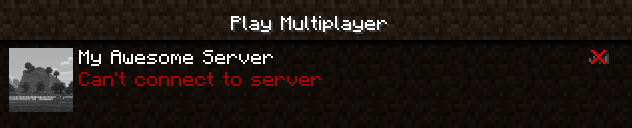
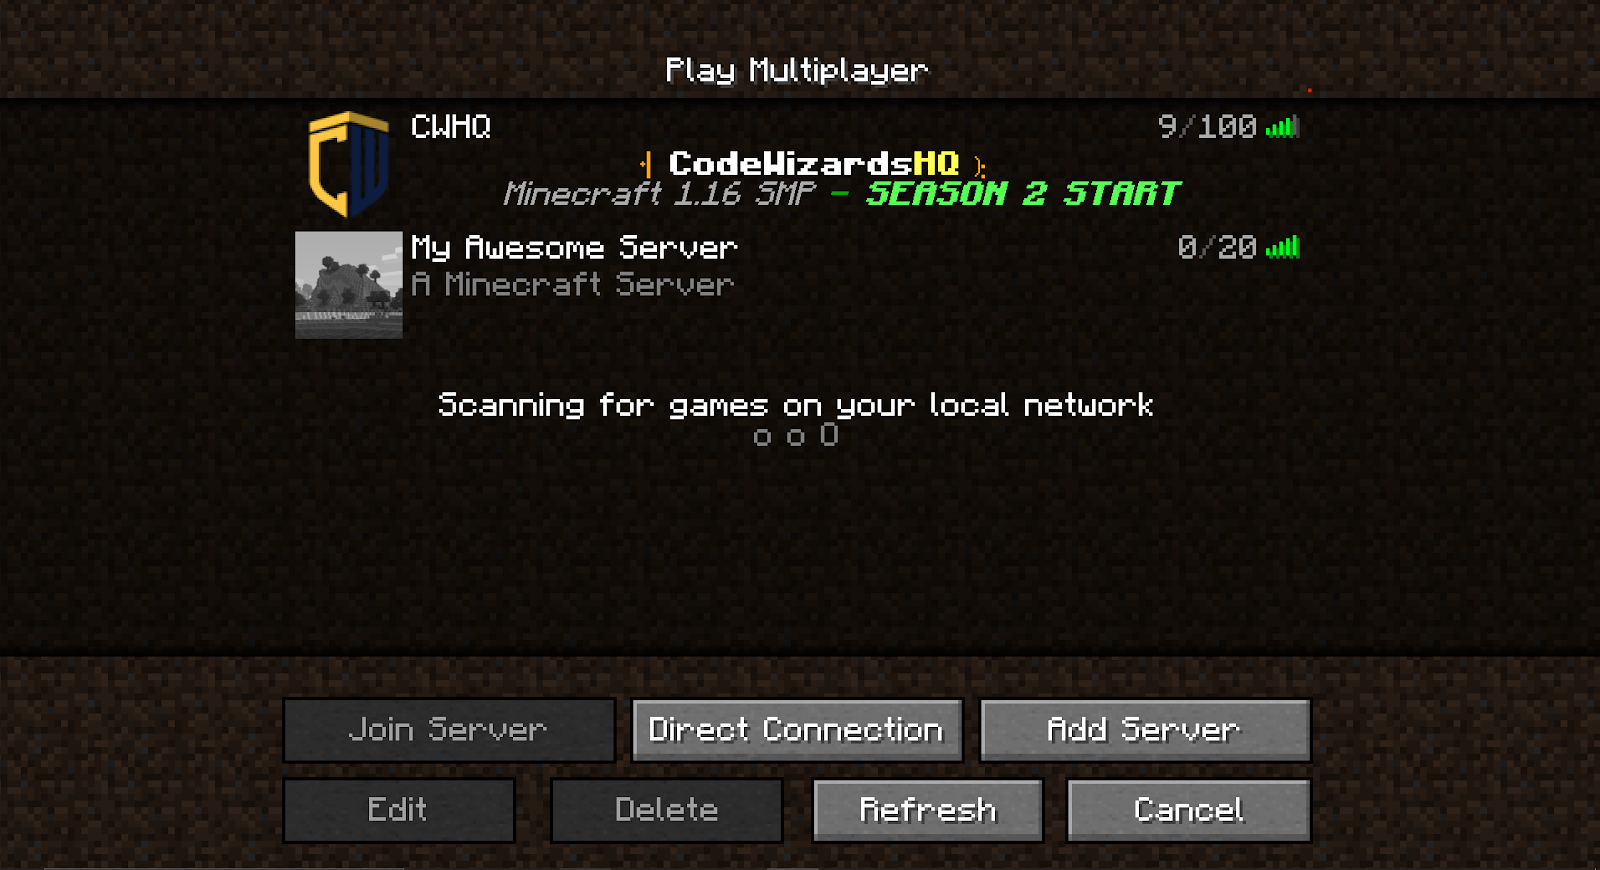
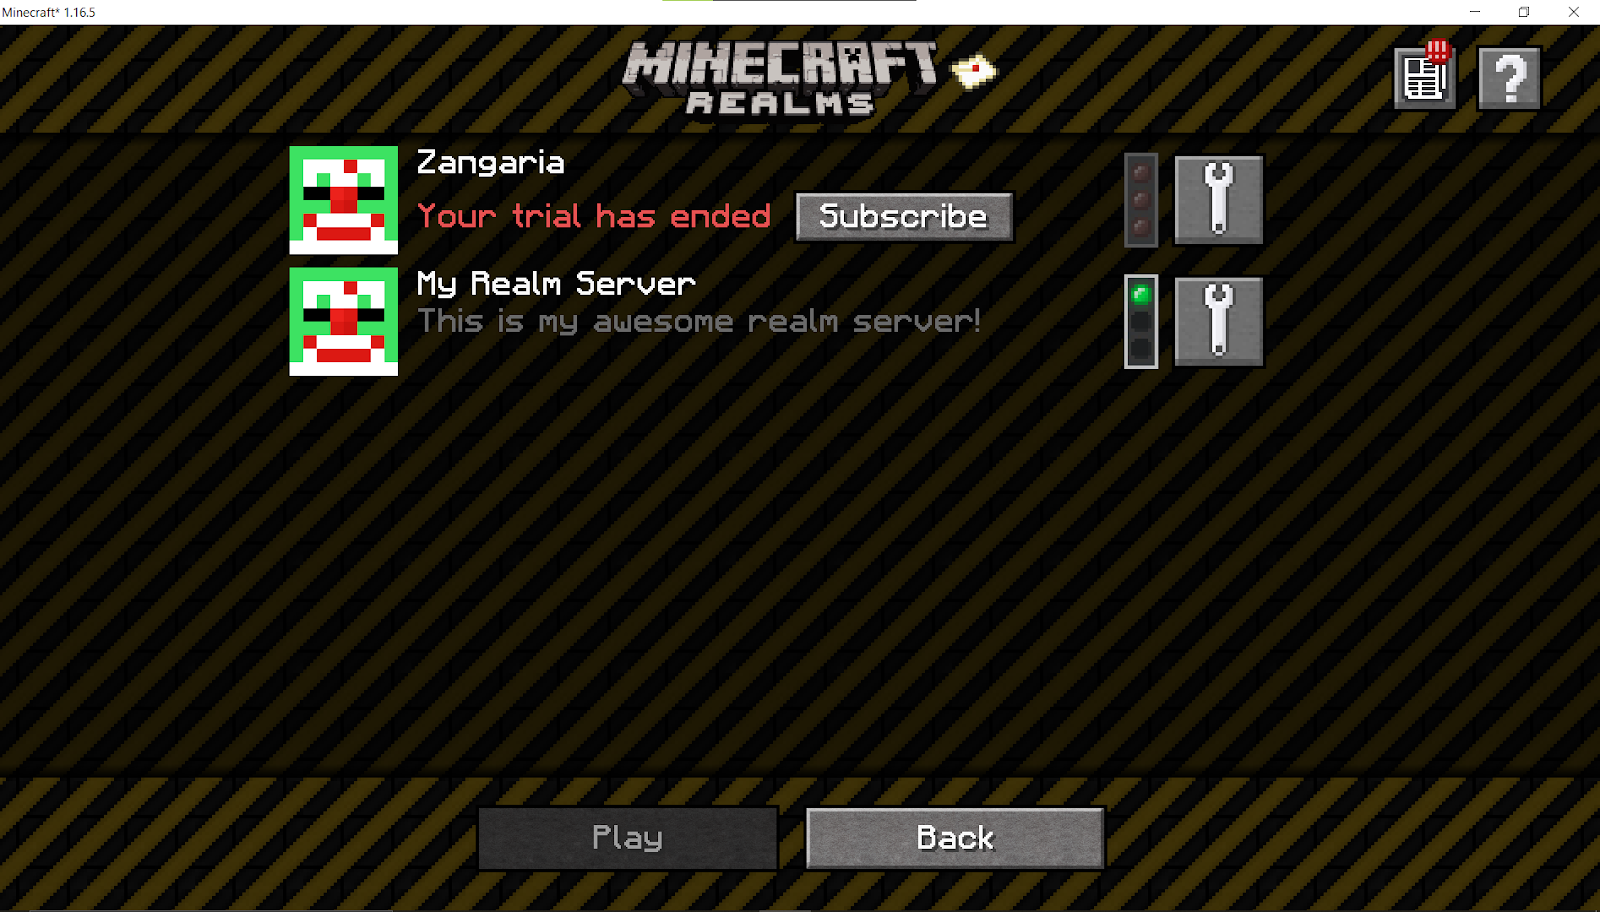
Alternatively, the host can verify by logging into Minecraft then navigating to the Multiplayer option and look for a green signal bar next to their server showing an active connection. If you see a red “X” and error message then it means the server is not running.
- Ensure that both players are using the same version of Minecraft
- Log into Minecraft with your username and password
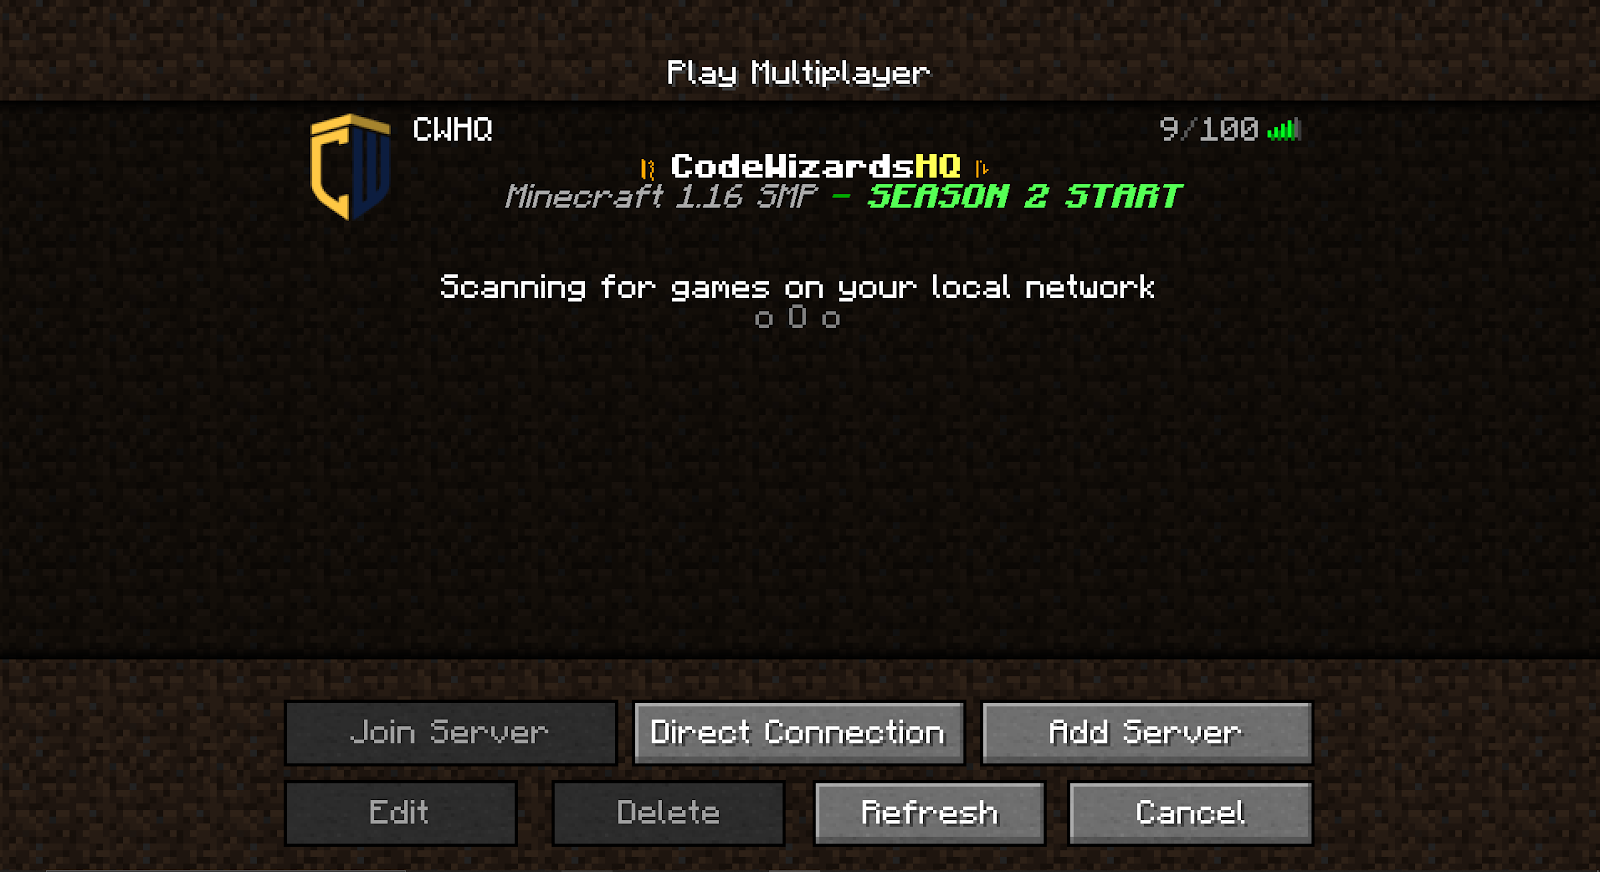
- Click the Multiplayer option
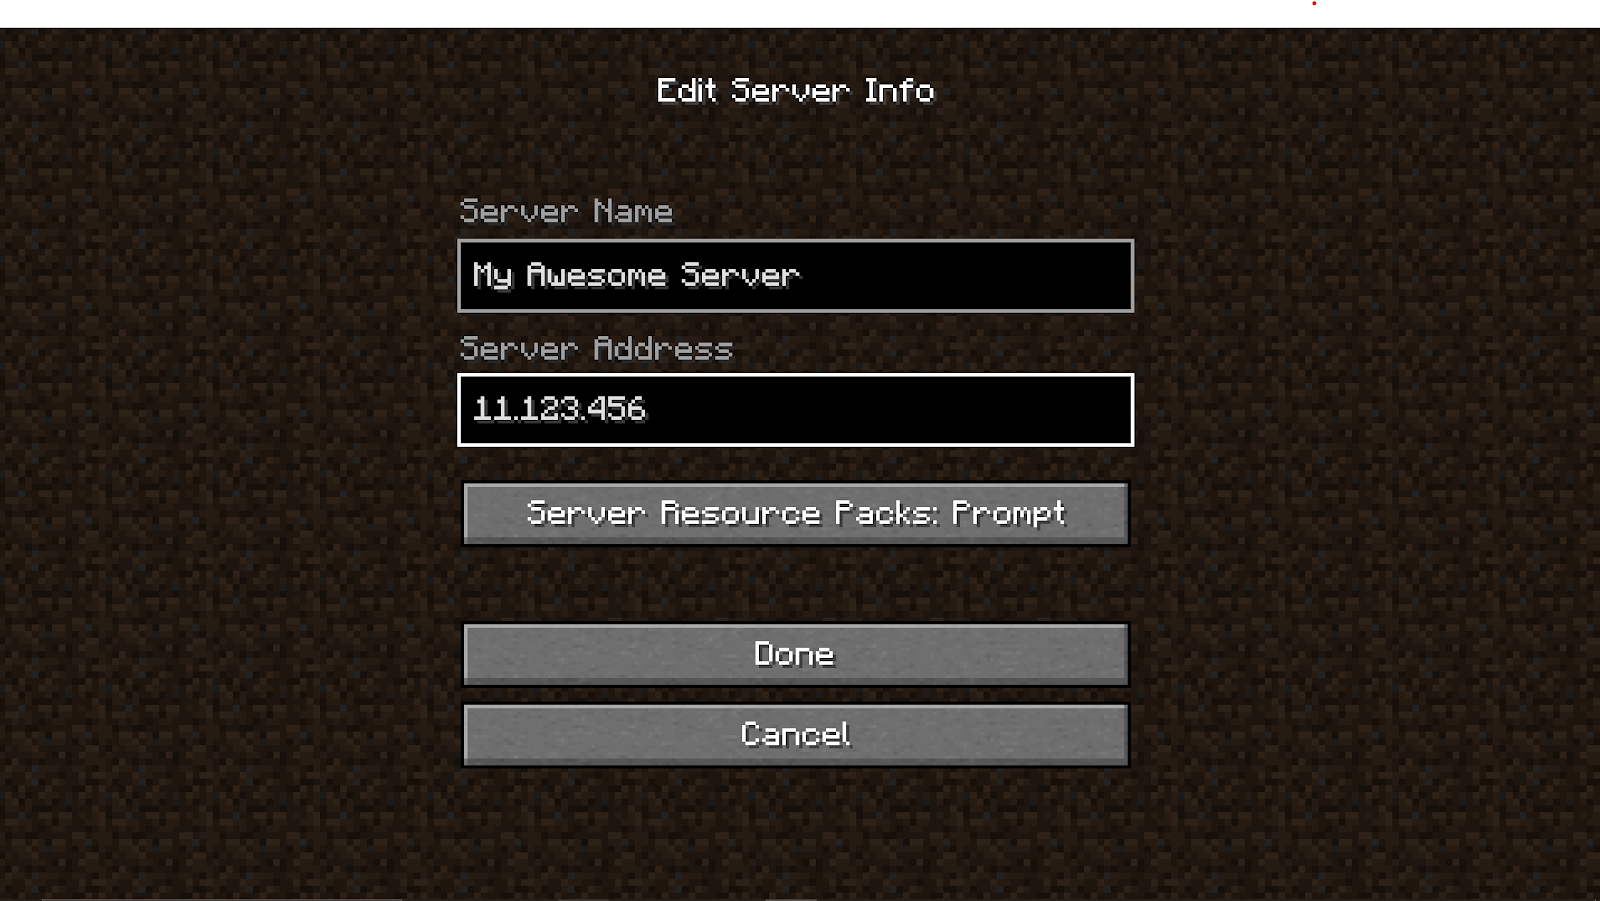
- Click Add Server
- Type in a server name
- Note: the server name can be anything you want and does not have to match what your friend named their server
- Type in the Server Address. If your internet provider gave you a reserved IP address then use that. If not, use your friends’ IP address from where the server is being hosted.
Pros/Cons of Minecraft Server
Hosting a server yourself gives you a handful of benefits such as complete control without relying on someone else when you need to make changes, the ability to use your own hardware to increase performance as desired, and not having to pay someone else to do it for you! You can configure your server however you like and there is no limit on what type of mods you can support.
Its drawbacks consist of needing the hardware to run the server which can get very expensive if you don’t already own it. It might open you up to cybersecurity risks by allowing someone to access your network. It’s also nearly impossible to host your own Bedrock server at this time, so realistically speaking, it’s only available for Minecraft Java Edition. However, if you’re paying another company to host the server for you then getting a Bedrock edition shouldn’t be an issue. Finally, setting up the server is more technically advanced than any of the other options that Minecraft offers for multiplayer.
| PROS | CONS |
| – Complete control over server access and configurations – Ability to use your own hardware and upgrade as needed – Free to host – Can support any mods you want | – Can be very expensive to get started if you don’t already have a decent computer to host with – You open yourself up to higher cybersecurity risks by allowing people into your network – More complicated to set up when compared to alternate multiplayer options |
Recommended: How Minecraft Teaches Kids Coding
Minecraft Realms
Minecraft Realms are servers that are hosted by Minecraft itself. It’s similar to third-party server hosting, except the third-party is Mojang, the creators of Minecraft.
There are two versions you can use depending on if you’re playing on Minecraft Java Edition or Minecraft Bedrock Edition. If you are playing on Minecraft Java edition, you will need need to purchase a subscription for Minecraft Realms: Java Edition, but if you are on Bedrock Edition (mobile, Windows 10, Xbox consoles, PlayStation consoles, and the Nintendo Switch) then you will need to purchase a subscription for Minecraft Realms Plus.
How to join a Minecraft Realm
If you and your friends are planning on trying out Minecraft Realms then only one of you will need to purchase a subscription. You can do so by going to the Minecraft Realms: Java Edition or Minecraft Realms Plus website and following through with a credit card. Alternately, you can navigate directly to Realms Plus from the marketplace on your machine. After that, it’s as easy as sending your friend an invite to play.
Logging into your Minecraft Realm Server (Java Edition)
- Log into Minecraft with your username and password
- Click the Minecraft Realms Option
- Click “Click to start your new realm!” if this is the first time logging on.
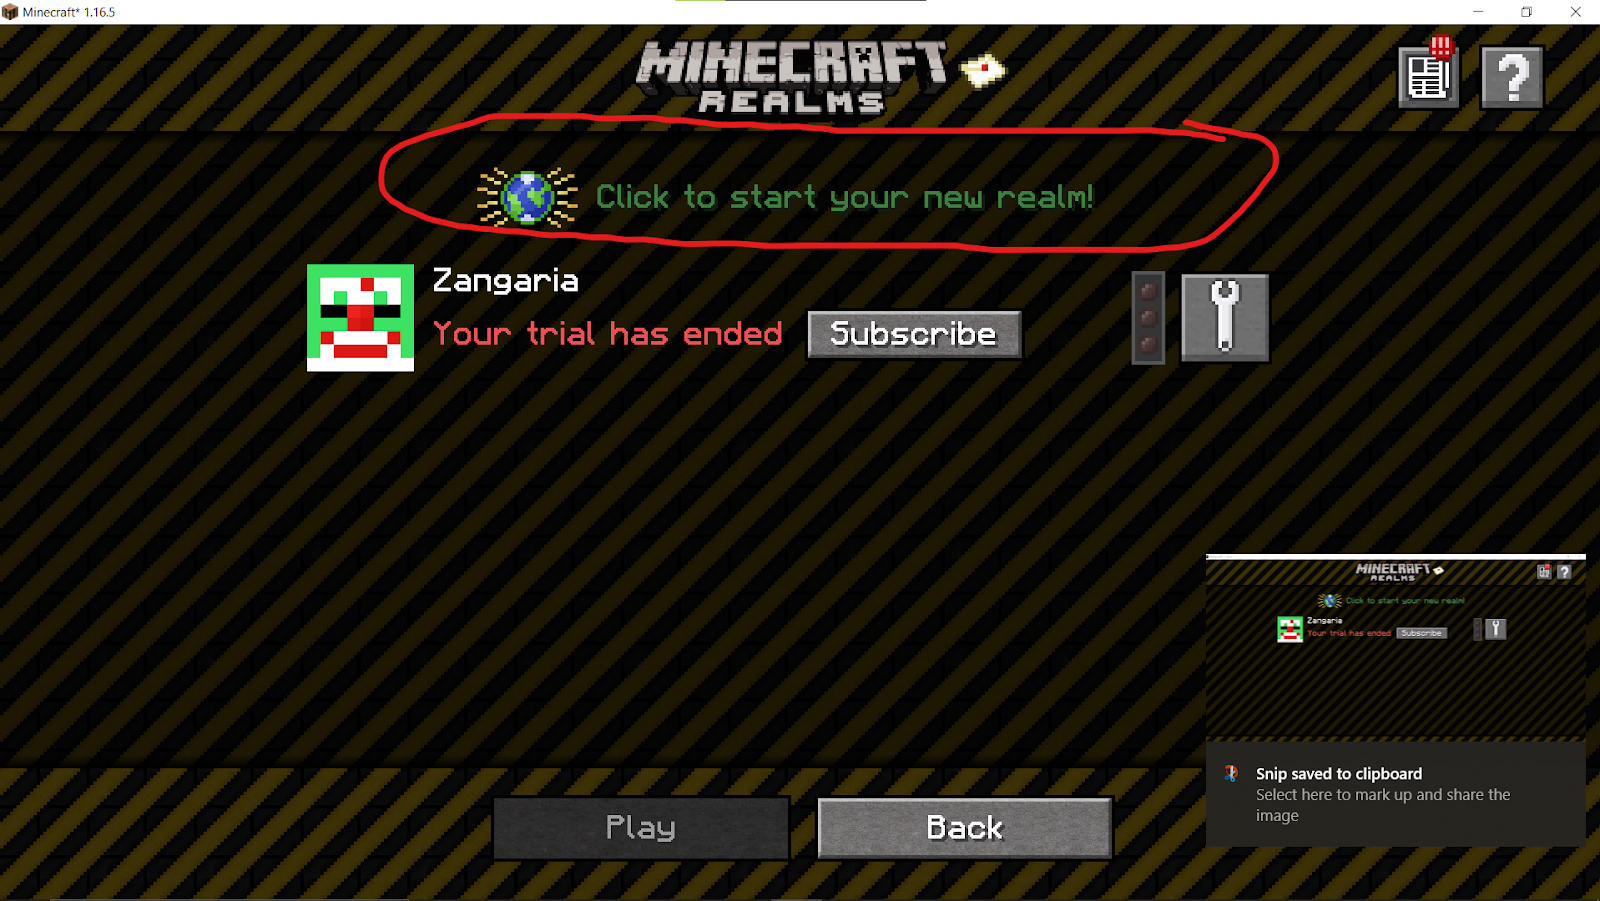
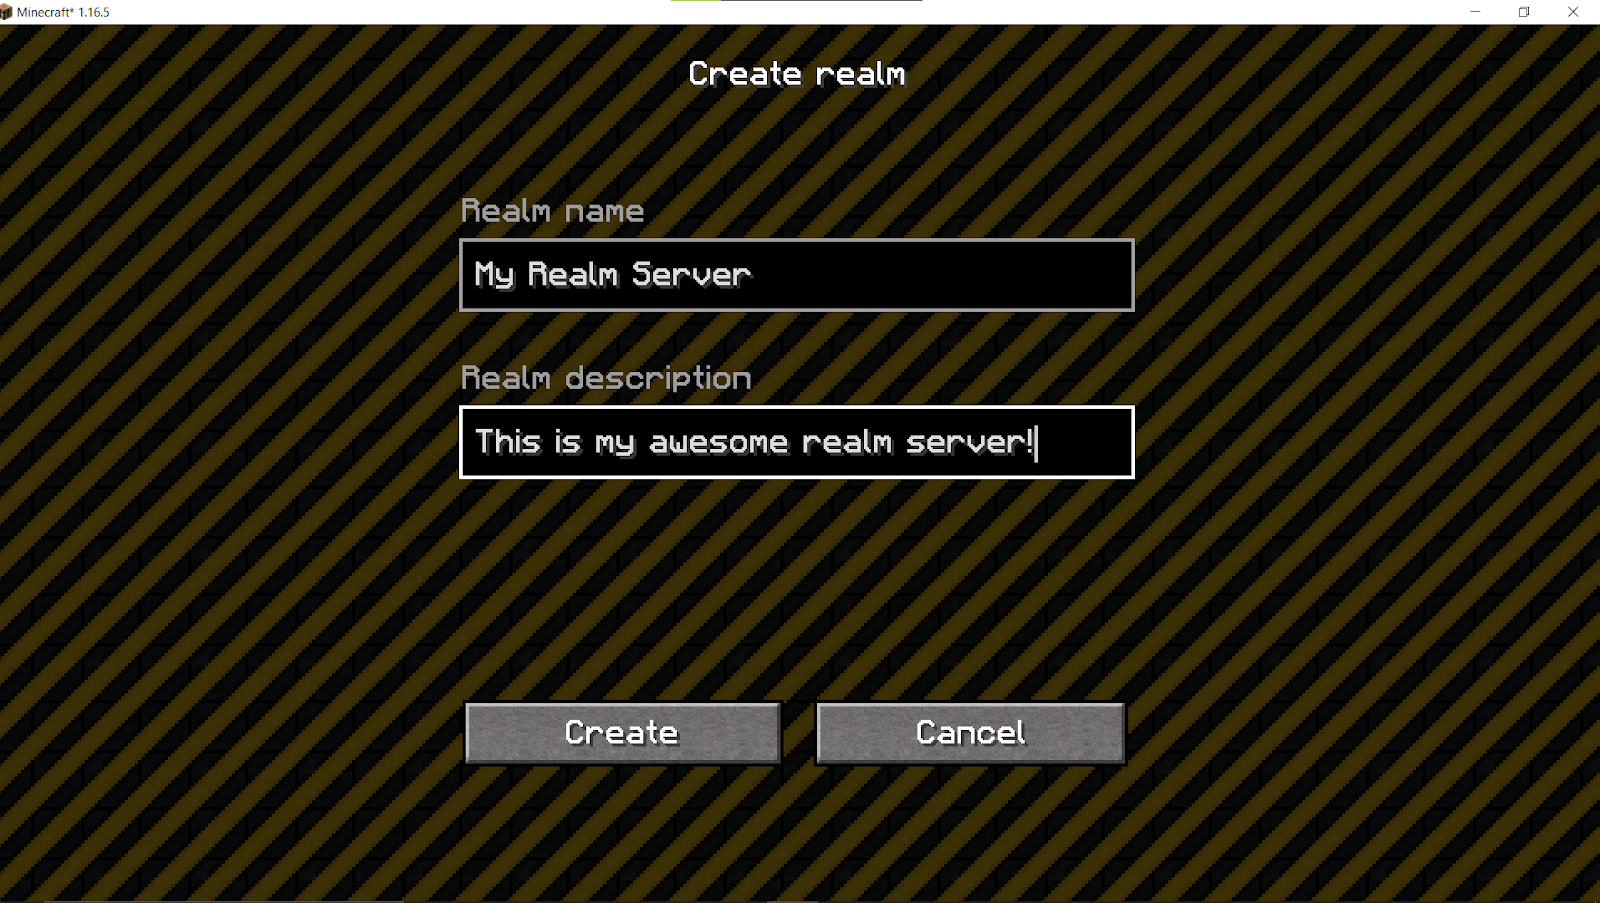
- Give your Realm a name and description and click Create
- If you desire, choose a world template from the list of available options.
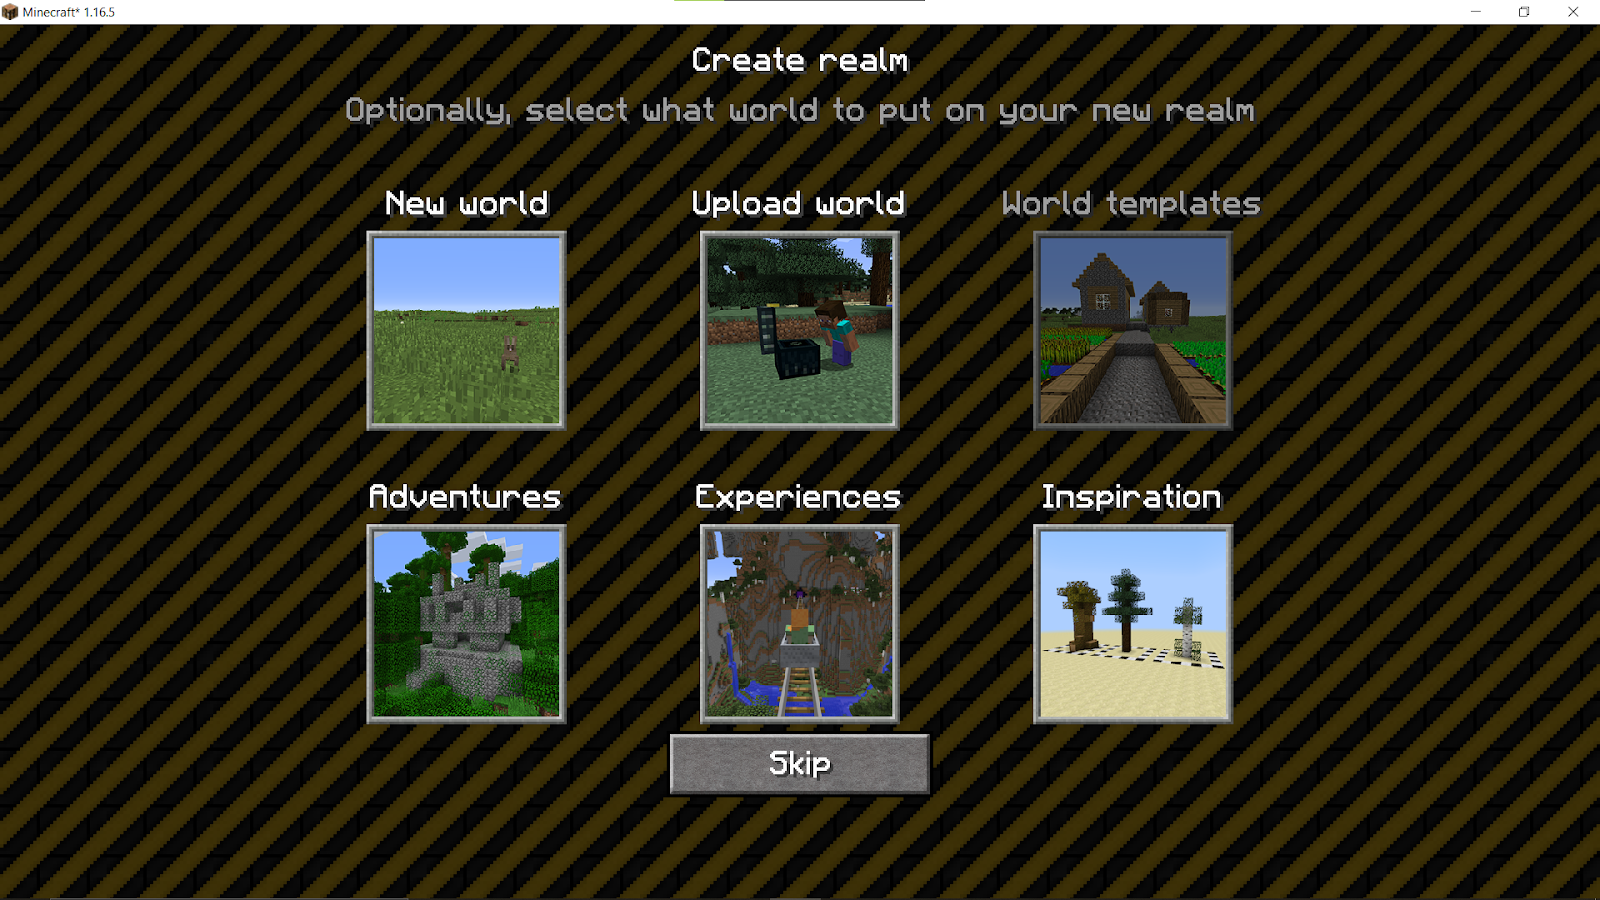
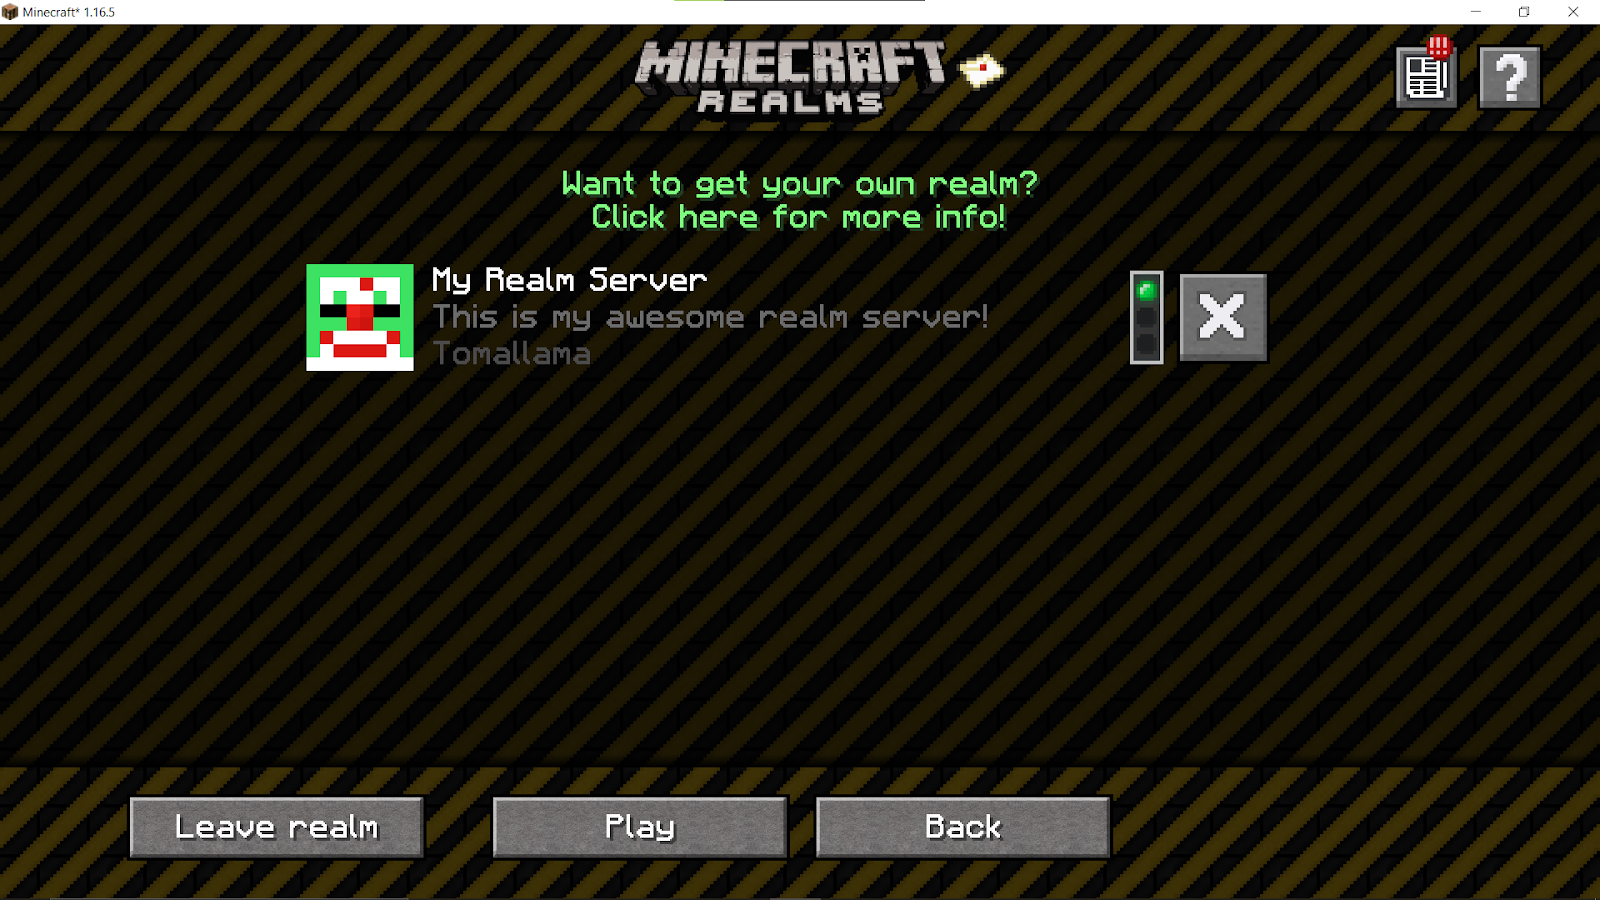
- Voila! You’re done! Depending on the world you picked it may take a bit of time to generate. You should now see your new server and can click Play to login.
Logging into your Minecraft Realms Plus Server (Bedrock Edition)
- Log into Minecraft with your username and password
- Click Play
- If you haven’t signed up for Microsoft Realms yet you should see an option for a free trial. You will, however, have to enter your credit card information, but you will not be charged until after 30 days. If you have already signed up, you should see your world available under the Realms category.
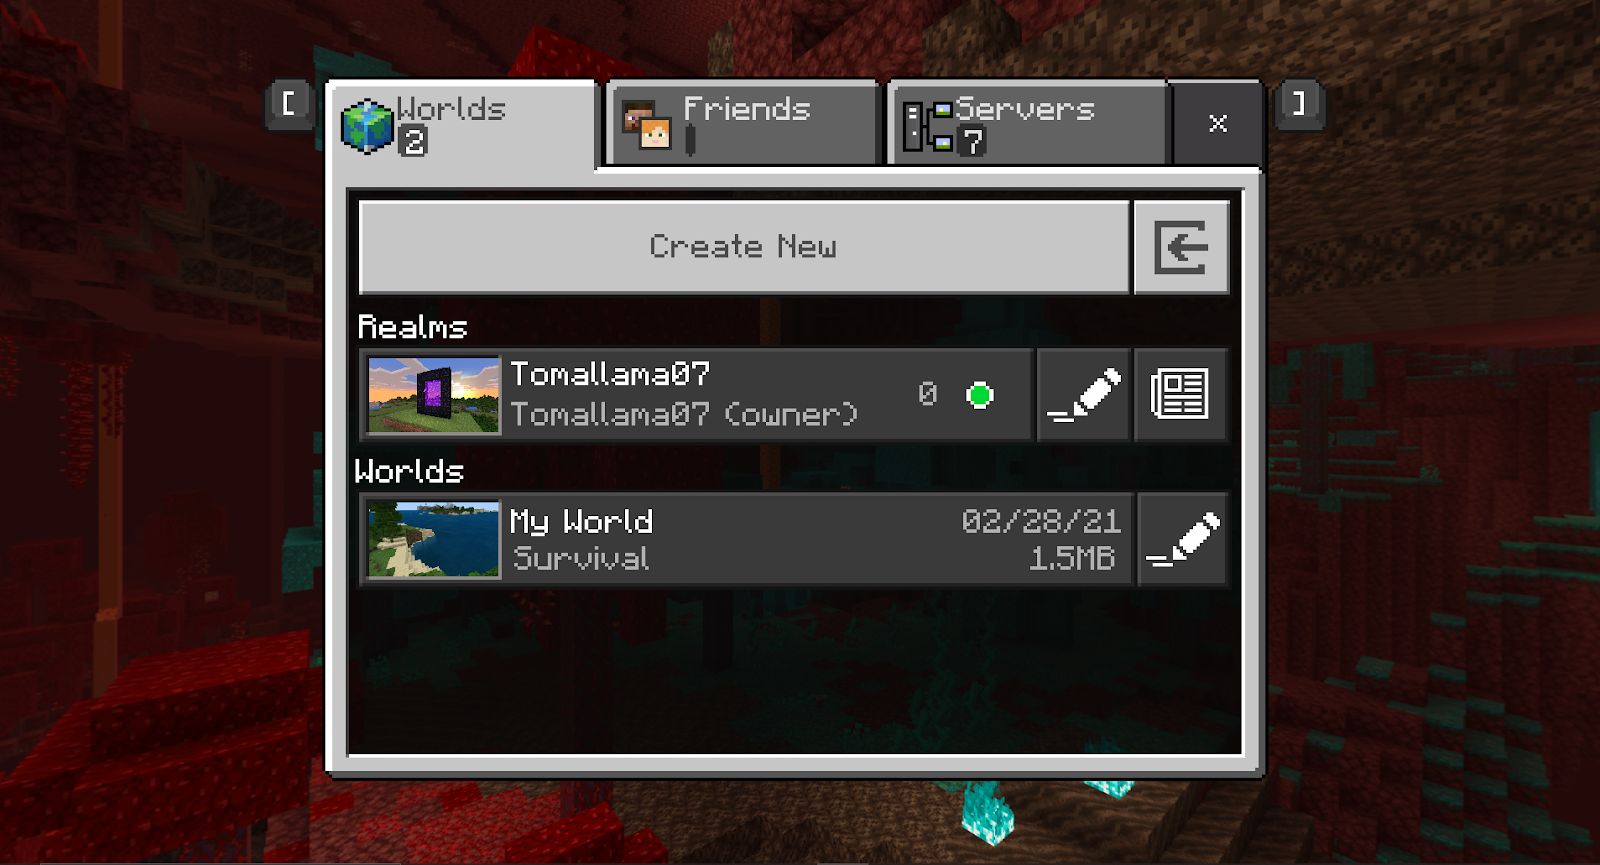
- Once logged in (or by clicking the pencil in the previous screenshot) you can edit your world and invite players.
How to invite people to your Minecraft Realm
No one can join your realm server unless they are specifically invited. Luckily, this process is very easy to do and does not cost any extra money.
Inviting a Player to your Realm Server (Java Edition)
- Log into Minecraft with your username and password
2. Click the Minecraft Realms option
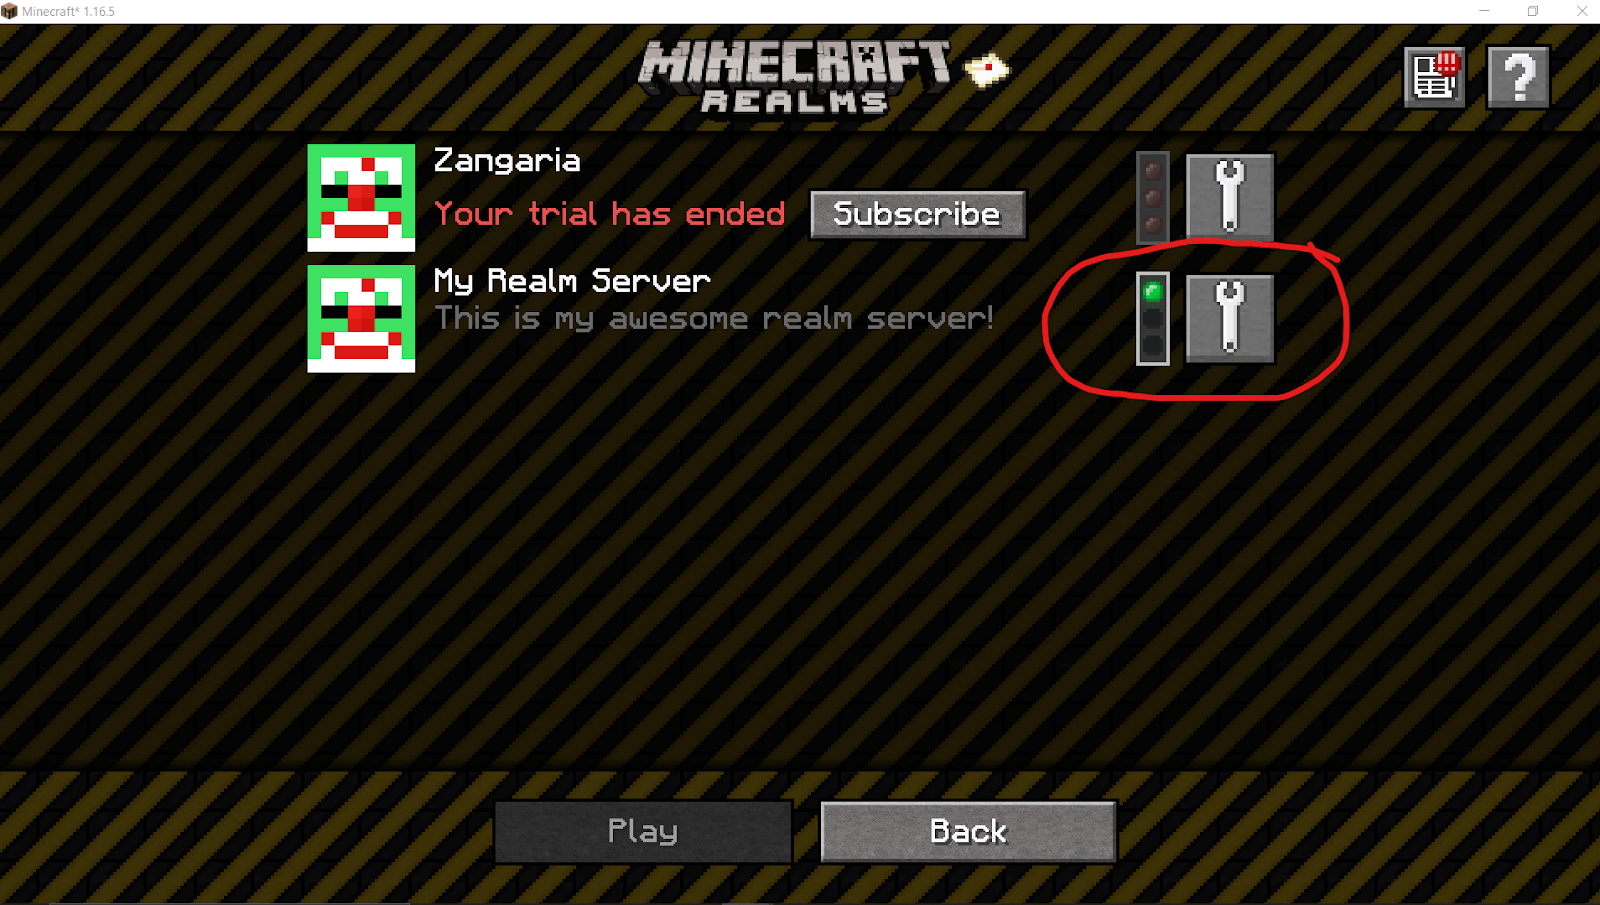
3. Next to your realm server, click the wrench symbol to configure your realm.
4. Click Players
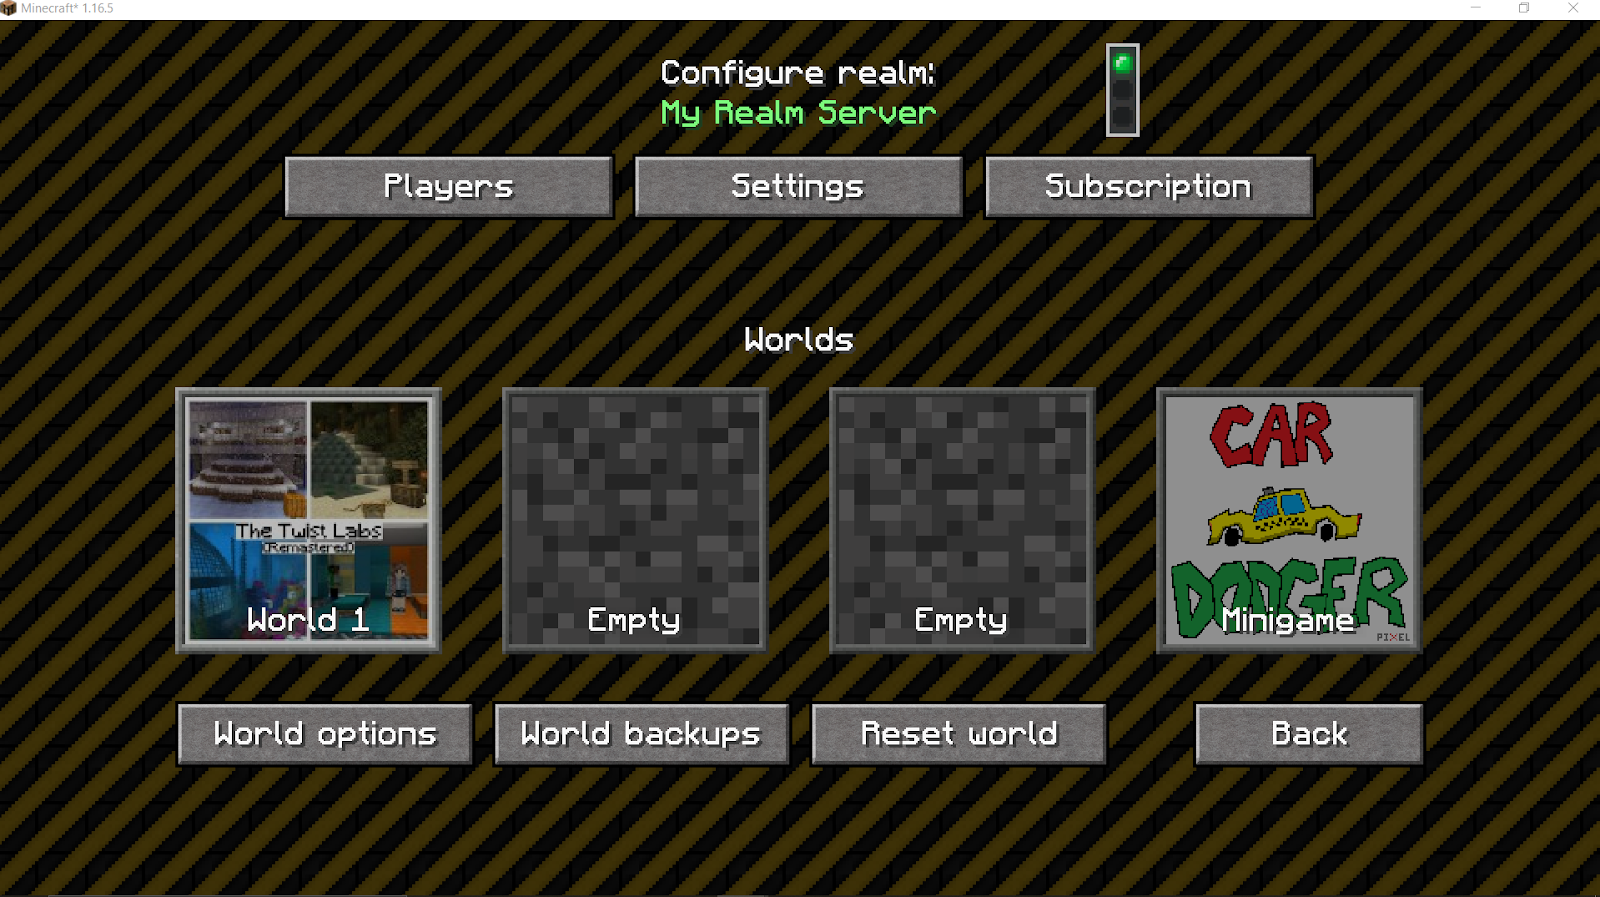
5. Click Invite player and type in your friend username

Accepting an invite to a Realm Server (Java Edition)
- Log into Minecraft with your username and password
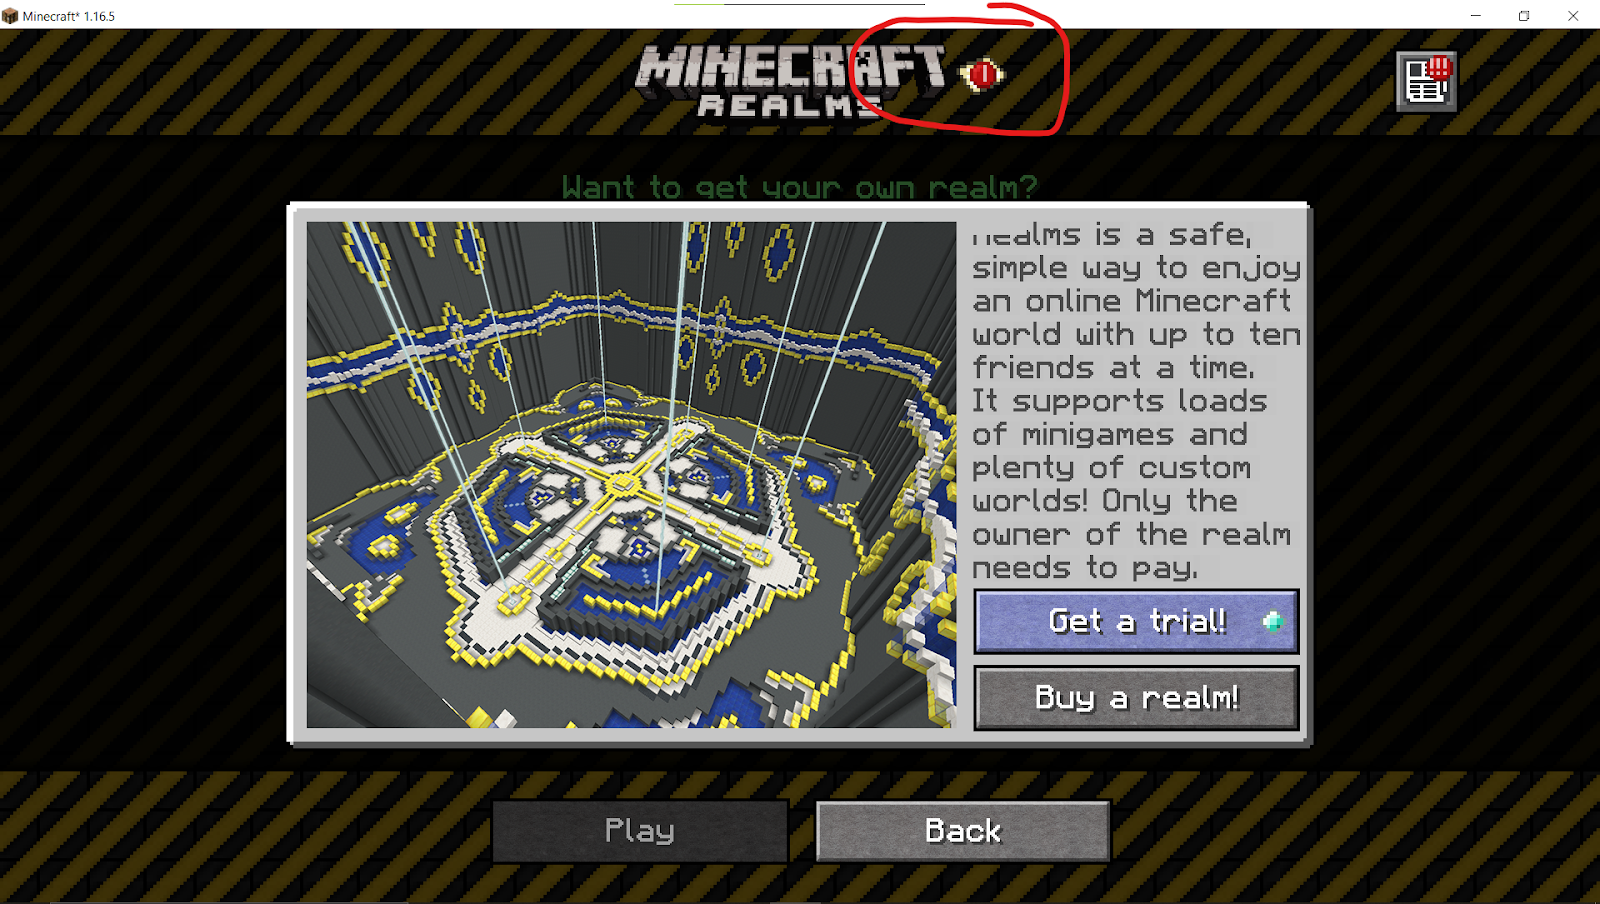
- Click the Minecraft Realms option
- Look for the jumping New Invites icon and click it. It’s in the top-middle of the screen.
- You should see an invite from your friend. Click the green checkmark to accept.
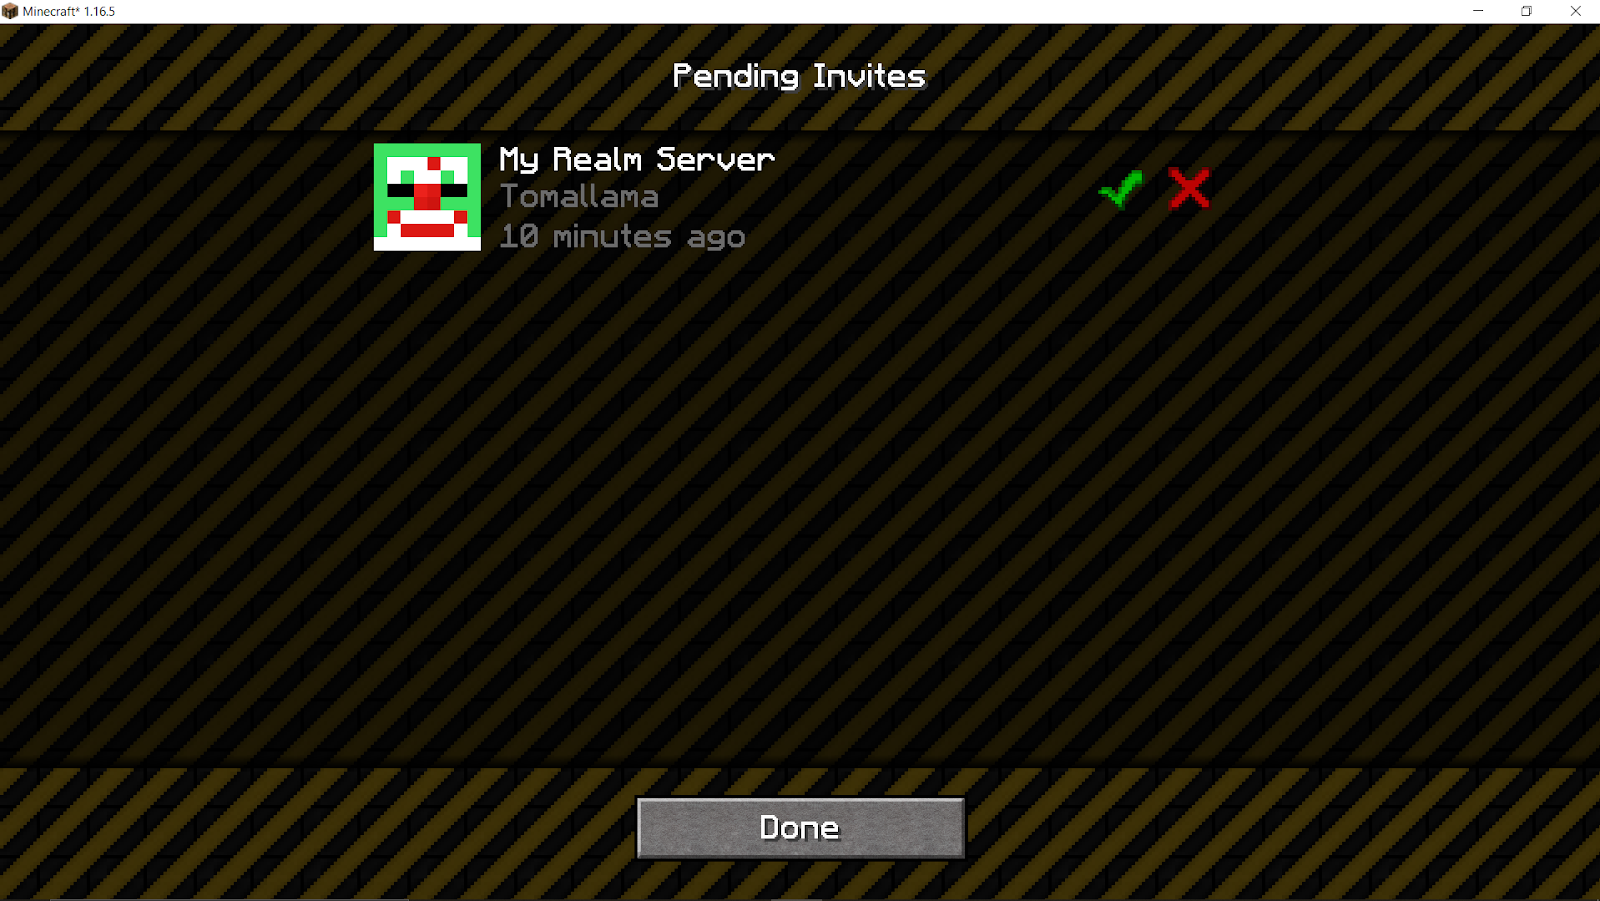
- Navigate back to Realms and you’ll now be able to log in and play!
Inviting a Player to your Realm Server (Bedrock Edition)
- Log into Minecraft with your username and password
- Click Play
- Next to your realm server, click the pencil icon. Alternately, you can go to Settings while logged into the game.

- Click Members
- You have a handful of options here. You can either click invite next to your friends’ name. If you are not their friend, you can click Find friend at the top. Or, the easiest way in my opinion is to click the Share link button and give that to your friend over text, email, snail mail, or word of mouth!

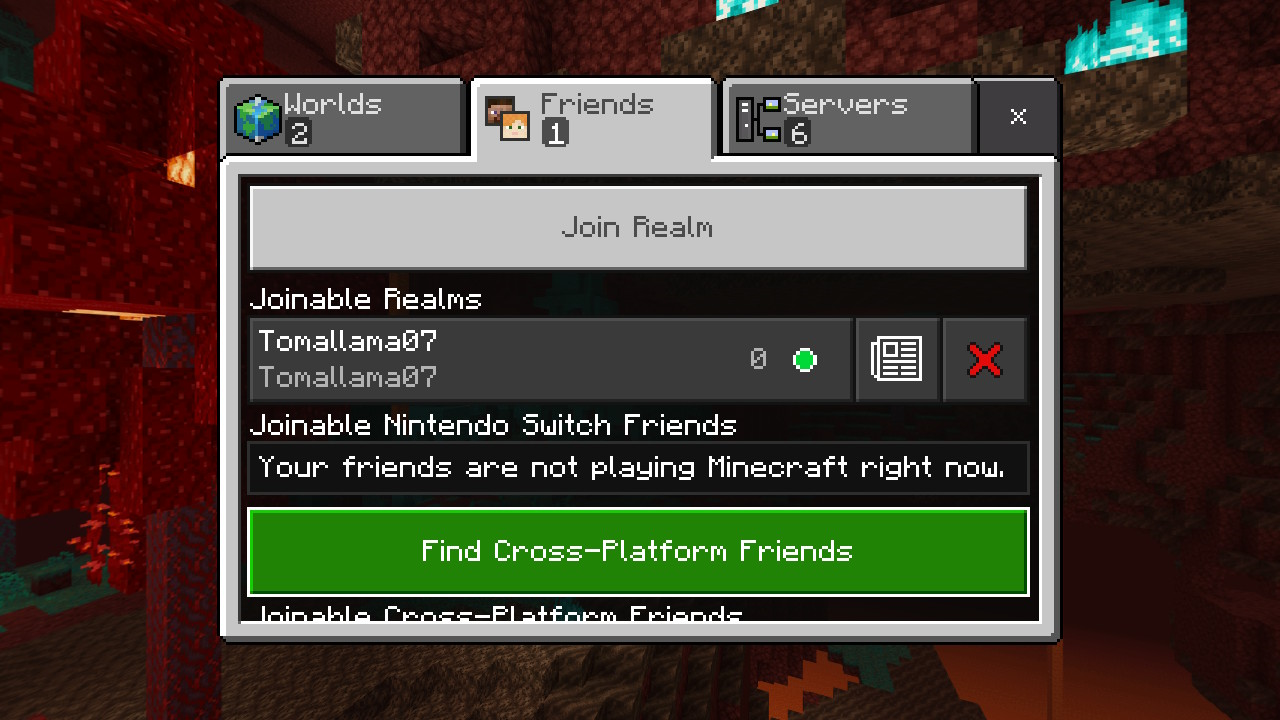
Accepting an invite to a Realm Server (Bedrock Edition)
- Log into Minecraft with your username and password
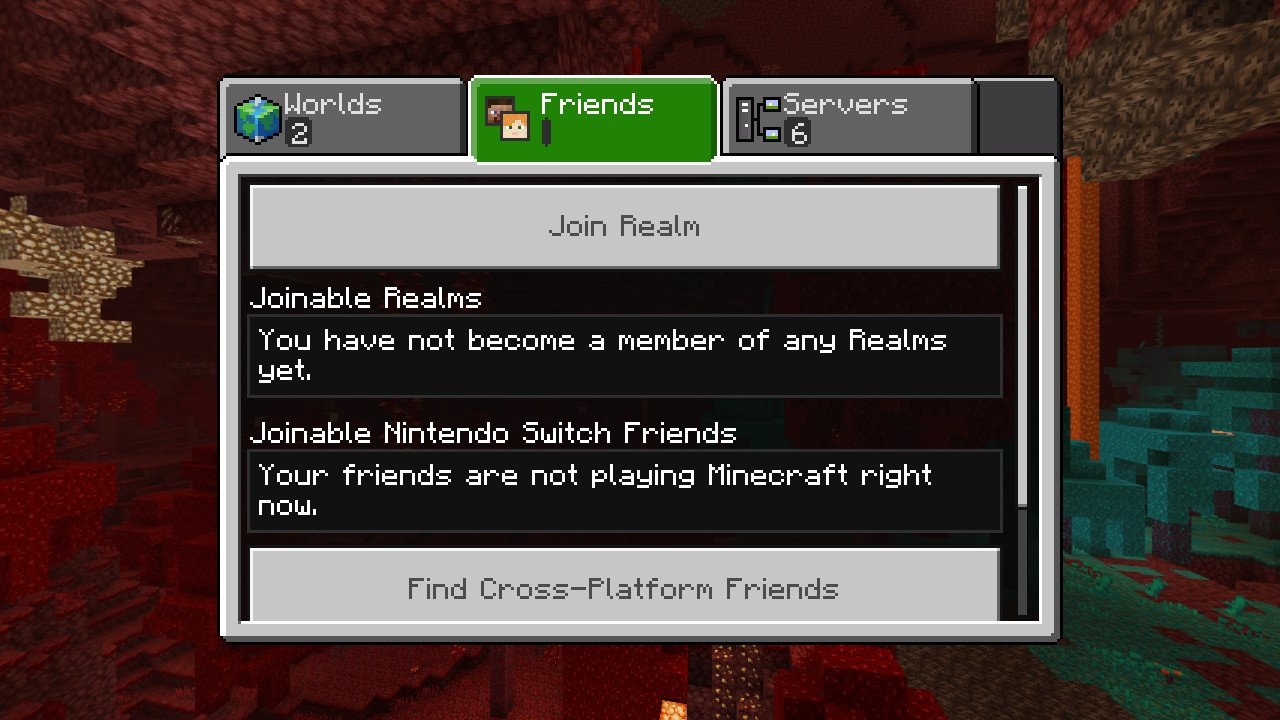
- Click the Friends tab
- Click the Join Realm button
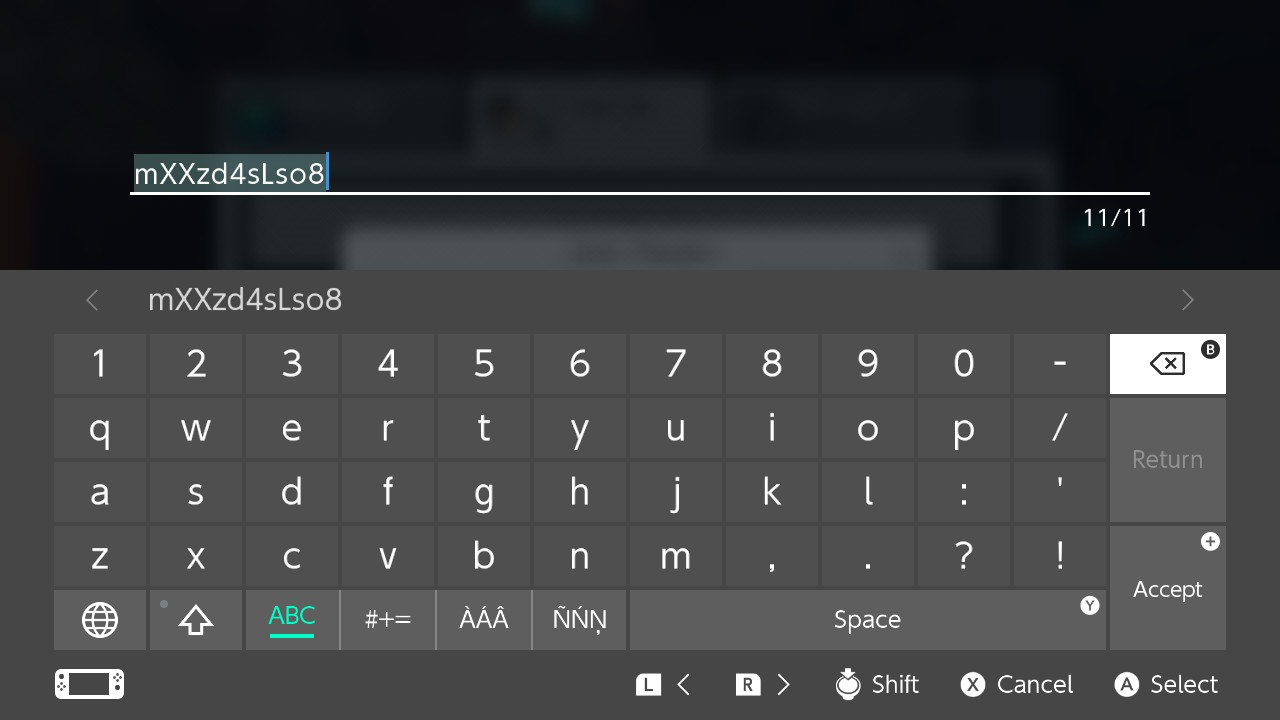
- Type in your invite code that your friend generated for you. Note: you only need to type in the last 11 characters, ignore the realms.gg/. That’s only for if you are clicking the link directly.
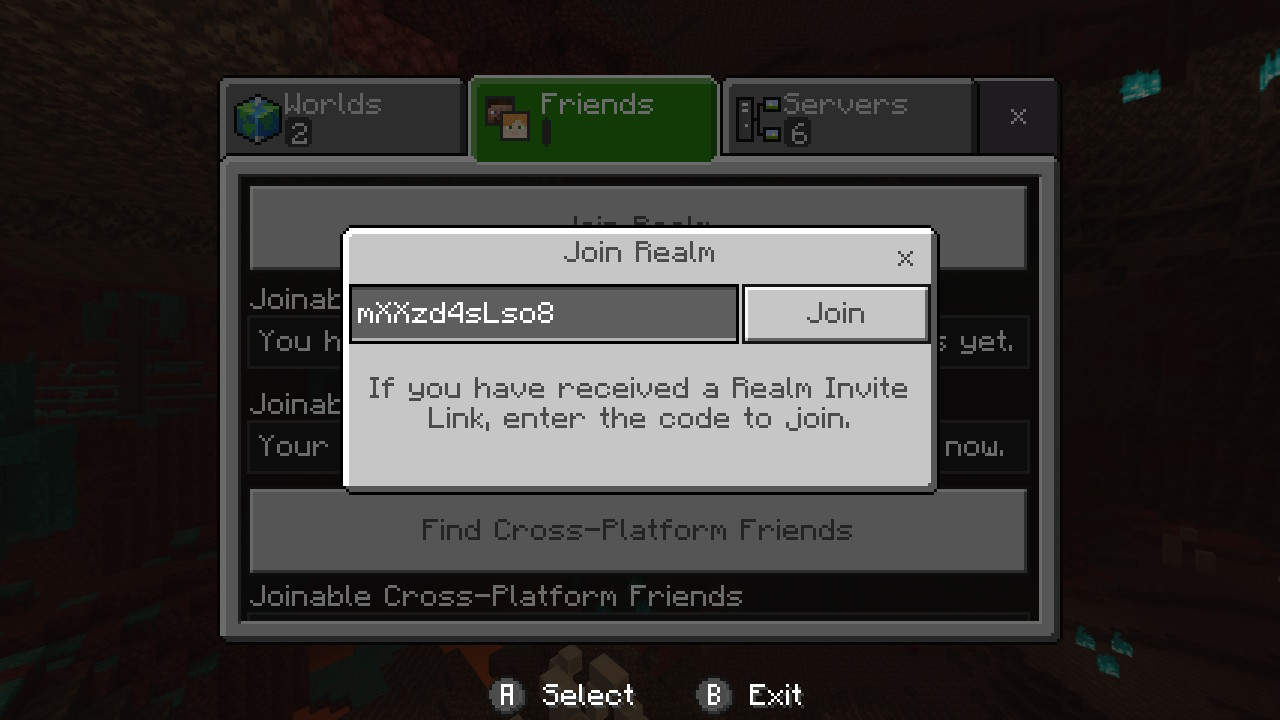
- You’ll see a new screen popup. Click the Join button.
- You’ll then see another new screen pop up (a bit redundant, I think) asking you to join one last time!
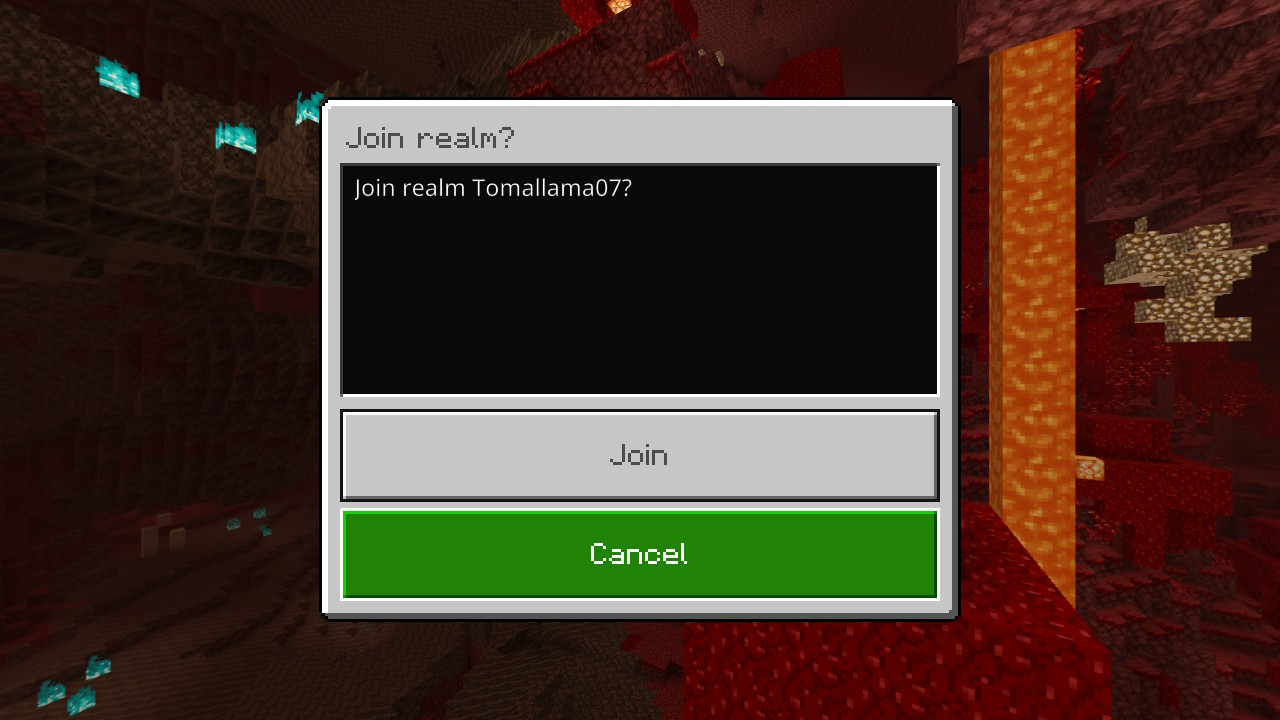
- Finally, you’ll see your friends’ realm pop up on the Friends tab. Click the realm and log in!
Pros/Cons of Realms
If you’ve done enough research there’s no doubt you’ve run into an article or two that will tell you how terrible using Minecraft Realms is. And to be fair, Minecraft Realms used to be terrible.
It was very expensive for what you got when it was easy enough to use another third-party to host a server for you. However, more recently, Mojang has really improved Minecraft Realms where it may be something worth considering.
If you’ve never used Minecraft Realms before, you get a free trial for 30 days. This in itself is completely worth it because, in my opinion, it’s more than enough time to decide if you and your friends will like it. Even though it costs money, so does using third-party server hosting. And Mojang is definitely someone we can trust considering they are the creators of Minecraft.
It’s also very easy to set up and log on, no crazy IP addresses or port-forwarding involved, just throw them a credit card and send an invite! Minecraft Realms Plus also comes with many advanced features such as a curated catalog of a plethora of Marketplace packs, monthly updates with new content, and support for local play that also has cloud storage.
Even though Minecraft Realms has gotten much better over the years, it’s still home to a handful of drawbacks. The biggest drawback is the player limit. Even though you can invite as many players as you want, only up to 10 can play at a time. This may not be an issue for you, but if you’re expecting a large server you’ll need to look elsewhere.
One small trick for groups of 11; if you have every player log on first aside from the owner, then the owner can log on and be an 11th player. Yay for hacks!
The second biggest drawback (or first for some people!) is the lack of mod support. While the Java Edition has custom maps and minigames and bedrock edition has add-ons from the marketplace, full modding support is currently unavailable. If you’re a fan of modding Minecraft, once again, you’ll need to look elsewhere.
Lastly, even though $7.99/month is not very expensive, it’s quite costly for what you get. You can use third-party server hosting for as little as a few bucks a month with full mod support and playing with a greater number than 10 or 11 players at a time.
| PROS | CONS |
| – Users get a free 30-day trial – Mojang hosts the server – Easy to set up – In the case of Minecraft Realms Plus, you get extra features and benefits that other server hosting companies do not offer – Easy way to manage who is allowed on your server | – A limit of 10 players (11 with the hack!) – No full mod support – Moderate price tag for what they offer |
Recommended: Java Programming Courses for High School
Start Playing Minecraft with Friends
If you’re enjoying Minecraft and looking for ways to play with other people there is no doubt that one of the options discussed here will work for you. You can choose to play cooperatively with a sibling using split-screen, you can avoid sitting in the same room with that same sibling using LAN, you can have someone else do all the heavy lifting for you, or you can even the boss and control everything.
If you want to experience a taste of social interaction while gaming why not join our Discord Channel and CodeWizardsHQ server? Our subdomain is mc.codewizardshq.com (server address). If you attach your Discord to our server you’ll even get some bonus benefits. Send a direct message to CWHQ Minecraft Server#9605 on Discord to join.
Most things are more fun with friends and that includes Minecraft. If you have any tips or questions about playing Minecraft with friends, share in our Discord!