Sprites are an integral part of the design and visual aesthetics of many classic and modern 2D video games. For kids who are coding their own games, they’ll want to learn how to make a sprite.
Games are usually made up of a lot of individual sprites. They are unique in every game and express the artistic side of game development. Students can get creative with drawing their own sprites in our kids coding classes.
Let’s walk through how to make a sprite.
What is a sprite?
A sprite is a 2D graphic or image that represents a character, object, or element within a video game.
The use of sprites originated with arcade video games. They were used to produce screen images more efficiently and meet technical limitations. Developers today use sprites because they are small in file size and easy to produce compared to 3D models.
Sprites make up the visual components of a game like the characters, enemies, items, and other interactive elements. They are often animated to create the illusion of movement and bring visual elements to life. This makes a game experience more engaging and fun.
An example of sprites are the main characters in popular 2D games like Mario and Sonic. The background images, like the questions mark boxes in Mario and the gold coins in Sonic, are also sprites.
How to Make a Sprite
Scratch is a simple and free way for kids to make a sprite for their game.
We use Scratch to teach fundamental concepts in our coding classes because it’s one of the easiest platforms for beginners and kids. It’s quick to get started and has its own library of sprites and game characters for those who don’t want to start from scratch.
There are also many other ways to make a sprite including SpriteLab, Photoshop, and Piskel.
Kids can choose whichever app they like best to draw their game sprites.
Steps to Make a Sprite in Scratch
Step 1 – Create a new project in Scratch
To get started, create a new project in Scratch. We will draw the sprite in this new project.
- Visit https://scratch.mit.edu/
- Login to your account
- Click on the “Create” button
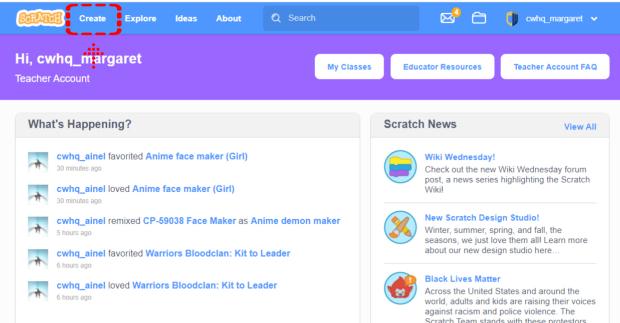
- Name the project
- Click on the trash can to delete the cat sprite
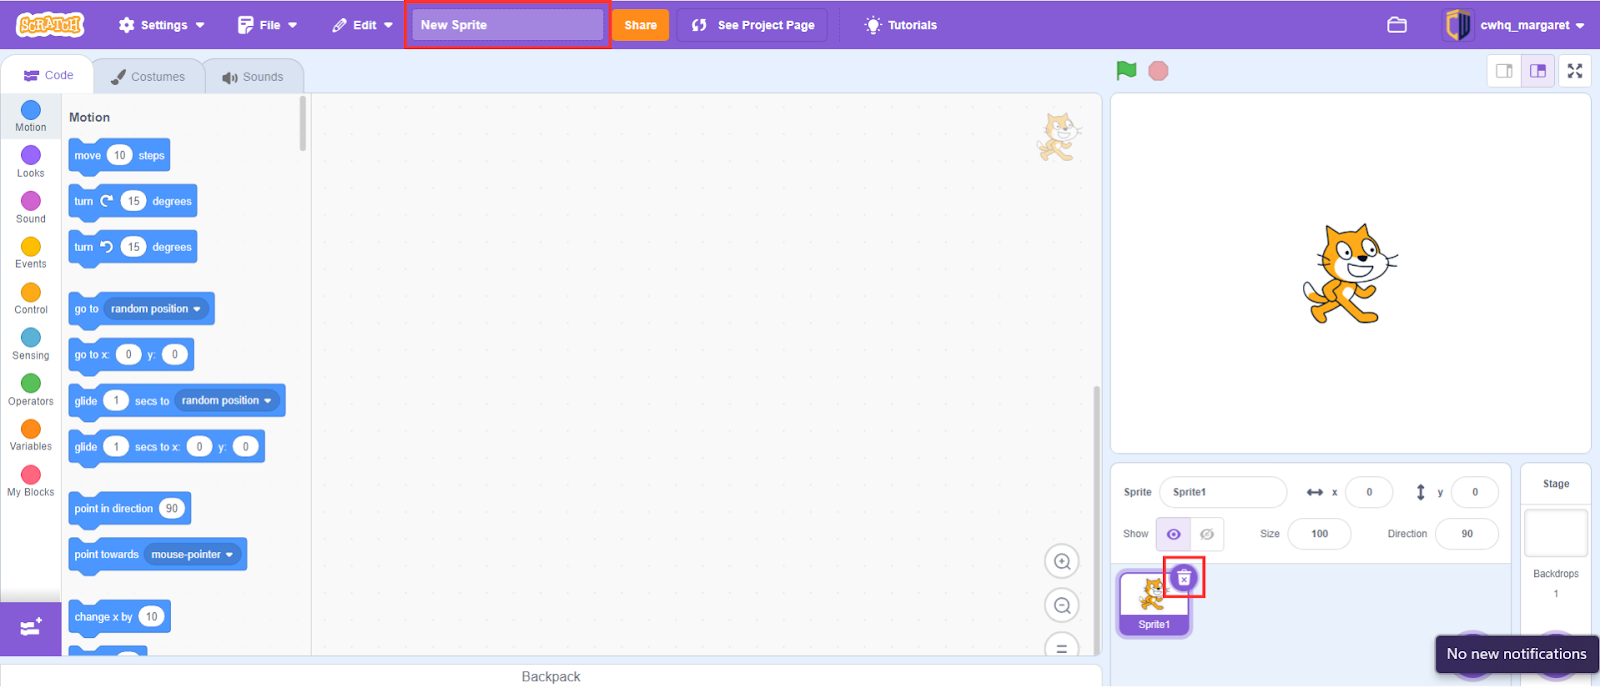
Step 2 – Select the “Paint” option to create a sprite
In Scratch, kids can choose from 4 different ways to make a sprite:
- Choose a Sprite – we can choose from a collection of sprites offered by Scratch.
- Paint – opens a paint-like window where we can create our sprite.
- Surprise – this randomly selects a sprite from the Scratch gallery.
- Upload Sprite – we can upload an image from the computer to use as a sprite.

We are going to use the “Paint” option in Scratch to make the sprite.
- Hover over the “Add sprite” icon
- Select the “Paint” option to draw your own sprite
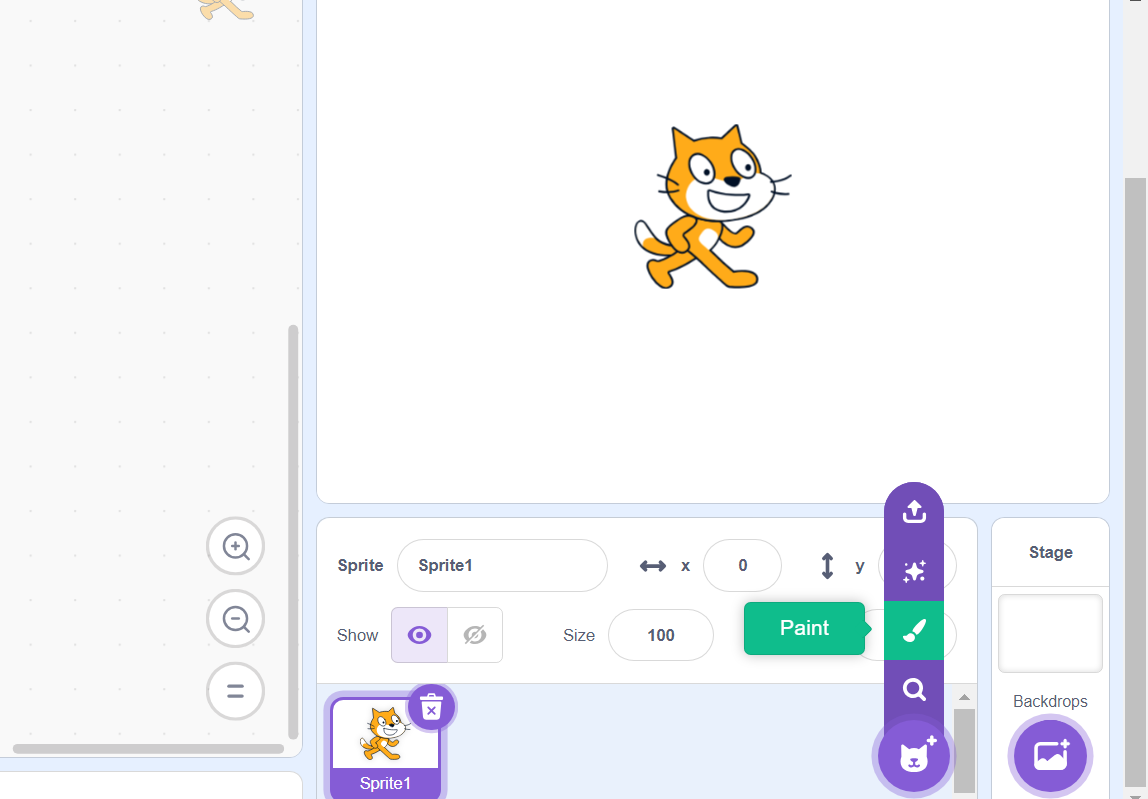
Scratch Paint Interface
Now, we are in the Scratch painting interface. The paint tool can be used to create new sprites and edit sprites from the Scratch library.
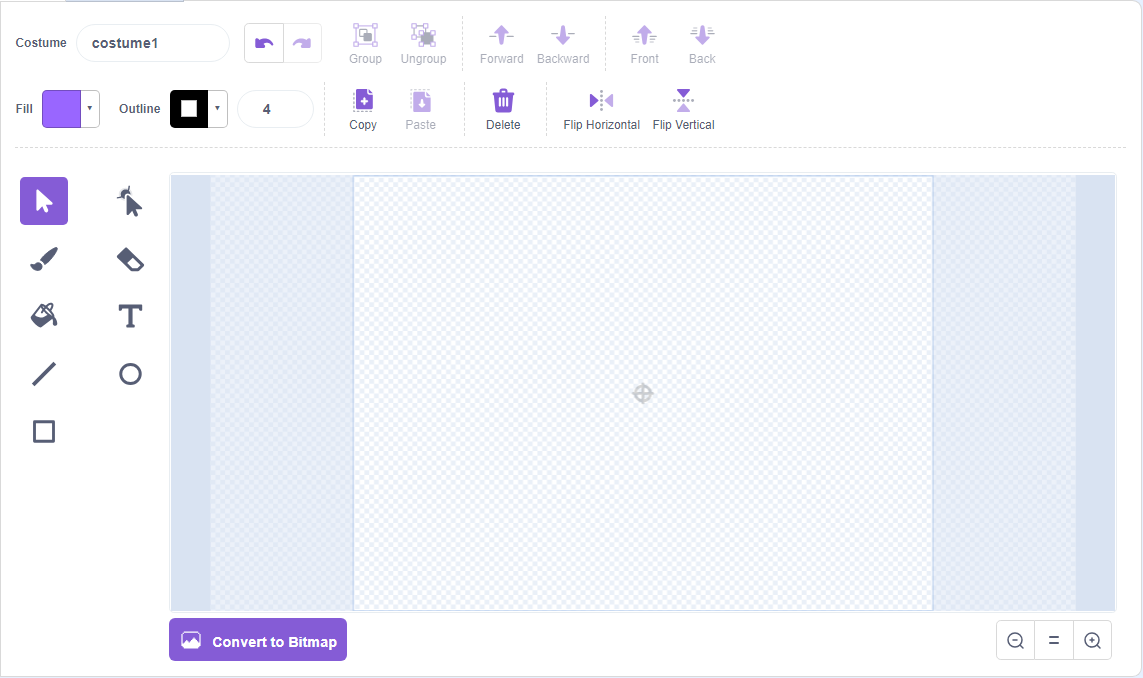
Scratch Paint Tools
| Tool | Use | |
|---|---|---|
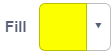 | Fill | Select the fill color. |
 | Outline | Select the outline color. |
 | Outline size | Select the outline size in pixels. |
| Select | Select objects on the canvas. | |
 | Reshape | Reshape objects on the canvas. |
 | Brush | Draw on the canvas. |
 | Eraser | Erase objects on the canvas. |
 | Fill | Fill objects with selected color. |
 | Text | Write text on the canvas. |
 | Line | Draw a line on the canvas. |
 | Circle | Draw a circle. |
 | Rectangle | Draw a rectangle. |
 | Forward / Revert | Revert changes or go forward. |
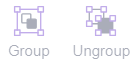 | Group / Ungroup | Group or ungroup elements. |
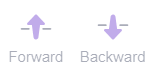 | Forward / Backward | Send elements forward or backward. |
 | Front / Back | Send elements to the front or back of all elements. |
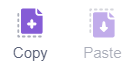 | Copy / Paste | Copy and past elements onto the canvas. |
 | Flip Horizontal / Flip Vertical | Flip an element vertically or horizontally. |
 | Delete | Permanently delete an element. |
Step 3 – Draw a sprite using the brush and shapes tools
It’s easy to draw lines and shapes using the line, circle, and rectangle tools.
Or grab the pen tool to draw freehand.
- Select the tool and the fill color
- Click on the canvas and drag your mouse to draw.
- Create an outline of the sprite
I’m making a flame sprite, but kids can let their imaginations run wild!

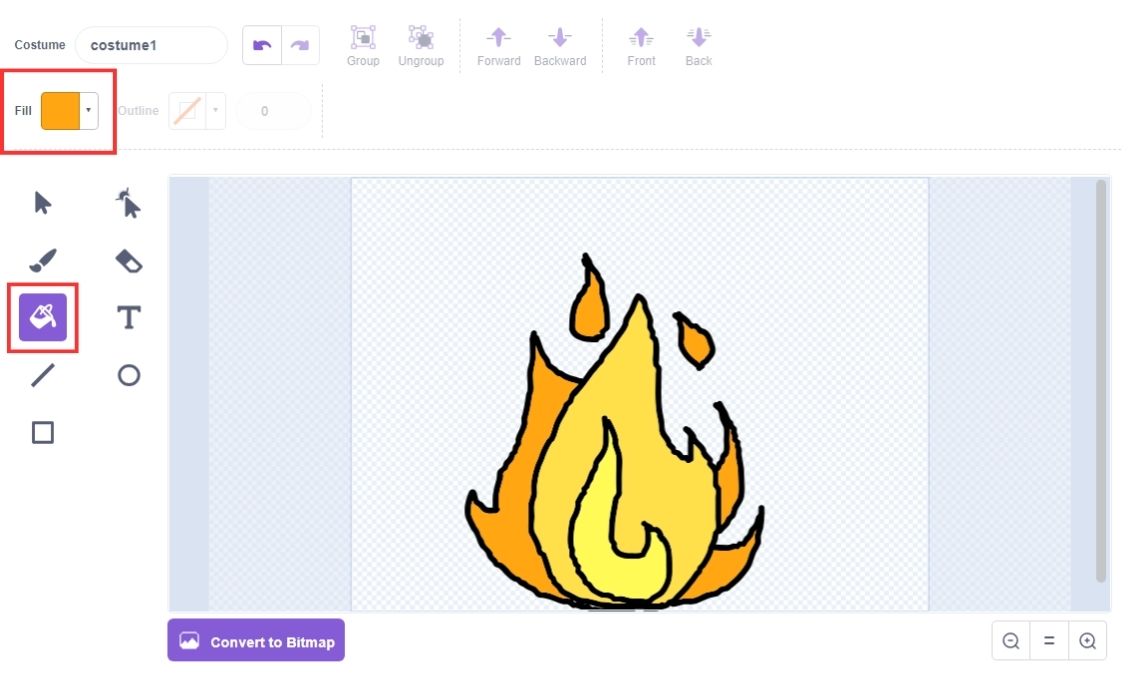
Step 4 – Fill in the sprite colors using the fill tool
Now that we’ve created an outline of the sprite, we are going to color it in.
- Click on the fill tool
- Select the fill color
- Click on the object to fill in
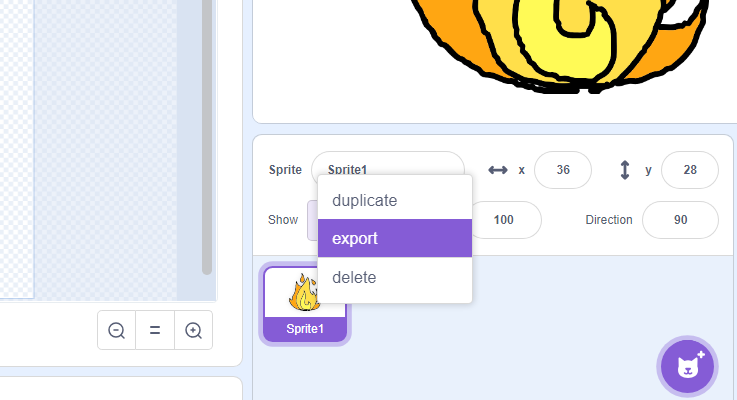
Step 5 – Export the sprite
Now that we’ve created an awesome sprite, it’s available to use in Scratch or to export for use in other games.
- Right-click on the sprite in the sprite menu
- Click export
The sprite will download as a .svg file.
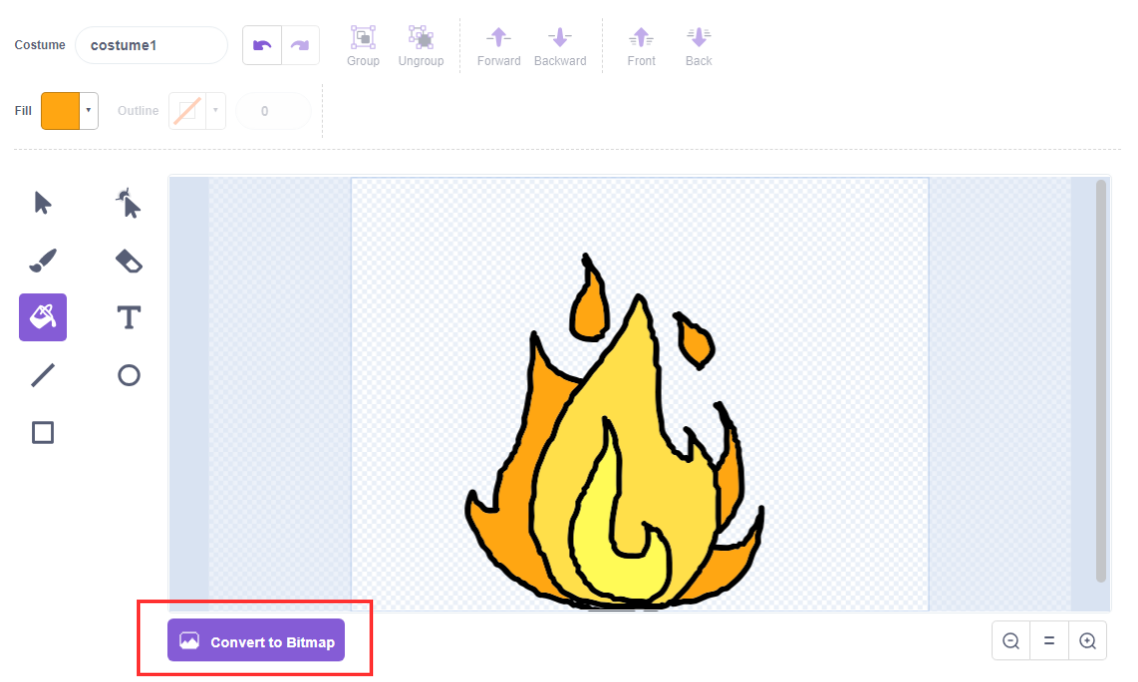
If we want to save it as a .png file. Click on “Convert to Bitmap” then export.
Bonus Step – Create a sprite in bitmap
Sprites are often created in bitmap because it stores color data without any compression. Images saved in the BMP format retain their full quality and detail. Bitmap sprites have a more blocky look than vector sprites.
Draw your image in Scratch using bitmap:
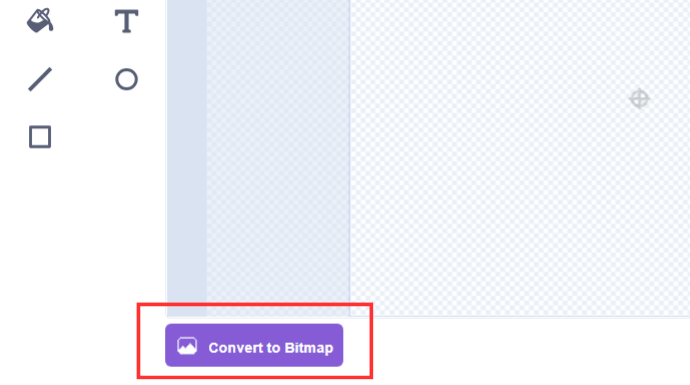
- Click the convert to bitmap button
- Change the brush size to 1
- Click + to zoom in until you can see 1 pixel
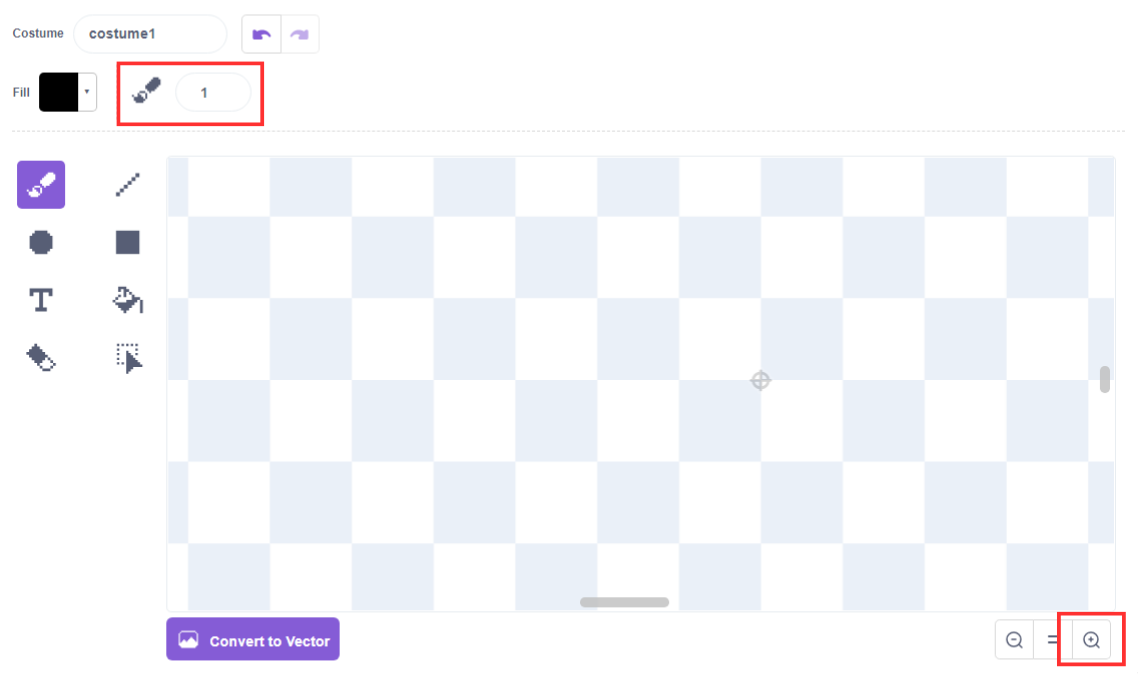
- Draw your sprite using the brush and shape tools
- Fill in one sprite at a time
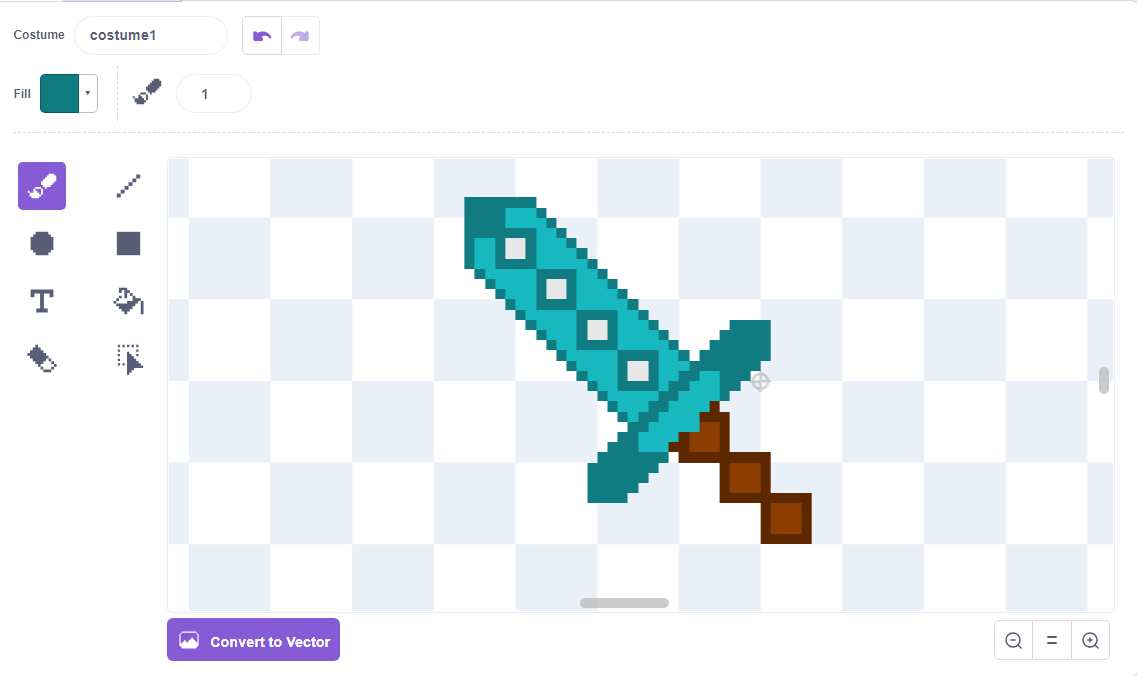
Now your sprite is ready to be part of your game!
Sprite Sheets
A sprite sheet is a collection of sprite images that represent the various animations and states of a character within a video game.
These use a grid or sequence of images that depict a character’s movements, actions, and poses.
Here’s an example of a sprite sheet for a flying bird:
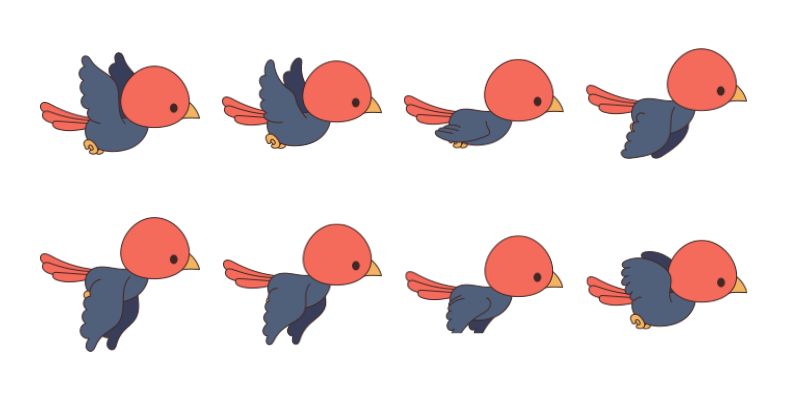
Each frame in the sprite sheet corresponds to a specific pose or animation frame. Game developers organize these frames into one sheet so they can efficiently manage and implement animations in their games. This method is more resource-efficient than using individual image files for each frame of animation.
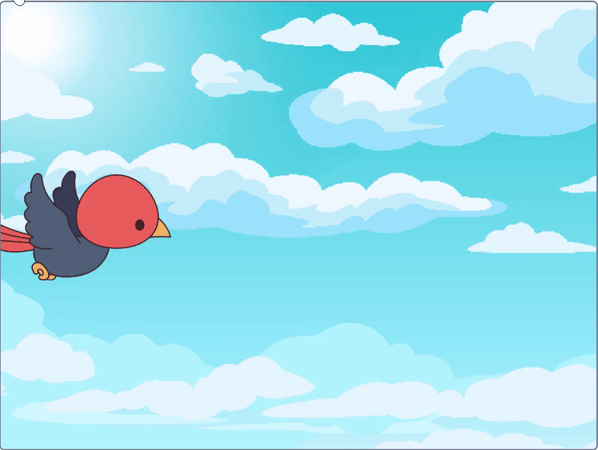
Using these sprites, we can create an animation of a bird flying.
Code Your Sprites in Scratch!
Sprites are an important part of playing a game and help create a unique visual world. Once the sprites are made, developers use code to bring them to life.
Kids can also add movement and animation to their sprites in Scratch with code. It’s the next step in exploring game development and coding for kids.
In the elementary school core track, kids learn about Scratch animation and game design along with problem-solving and critical thinking skills in a fun and engaging way. Enroll today to start coding.